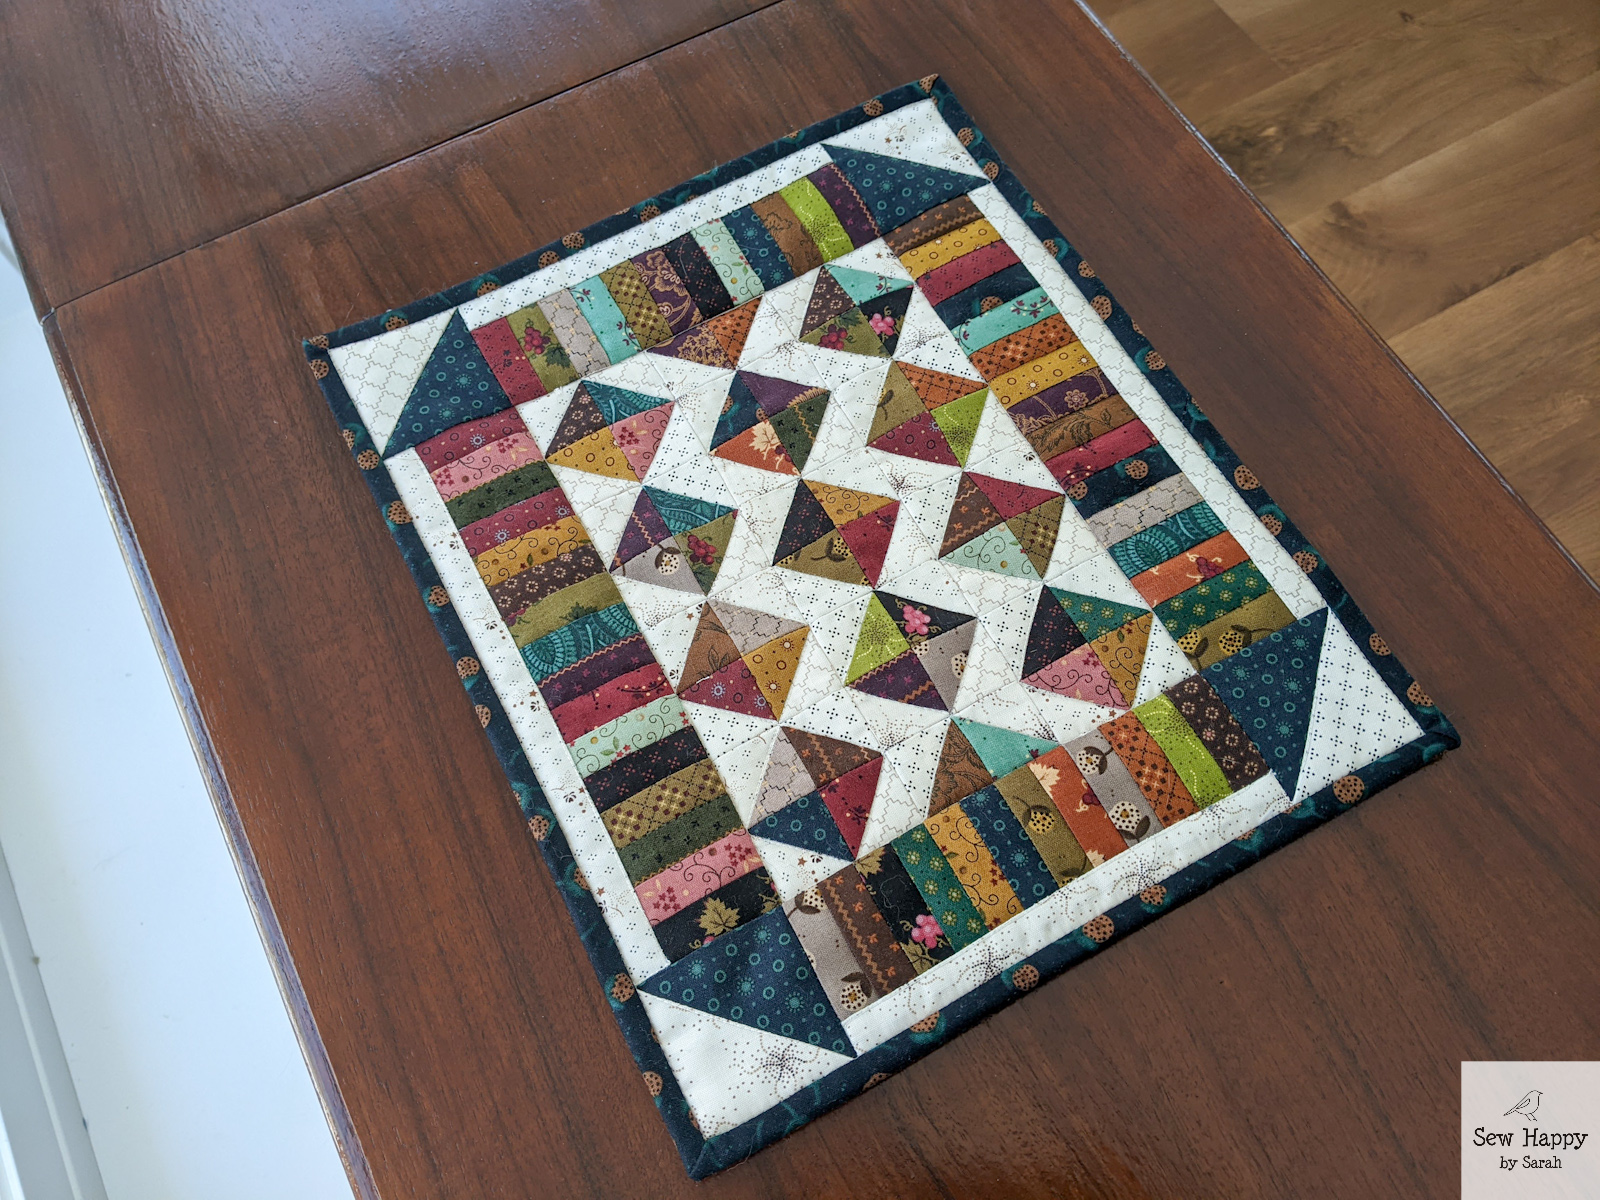
Another new year, another new Simple Whatnots Club! The first project from Simple Whatnots Club 12 is a true mini! I really like this size because smaller means a quicker finish. What cute diamond shapes in the center and colorful border. I’ve been working on my precision in seam construction (a 1/4″ seam is really important) and was pleasantly surprised everything came out accurate!
What turned out to be a cute zippered pouch, was not an easy feat! I’ve made a good number of bags and pouches, but have now realized I depend on a detailed pattern with clear instructions and illustrations or photos. This is especially necessary with three-dimensional projects. In general I trust the process that the bag will all come together, but when the pattern isn’t clear I have many more doubts along the way making for a stressful time! This pattern didn’t have enough detail for me so I found it very difficult to follow.
I do love the style of the pouch. The vinyl pocket in the front is what interested me enough to buy it and the glitter vinyl that came in my kit really makes it fun! The Large size I made will hold a lot, so I’m happy with that as well.
I made some modifications along the way as I was trying to figure out the construction. I used By Annie’s Soft and Stable instead of the heavy interfacing it called for because I know Soft and Stable makes a bag stand up great! I decided to quilt the main fabric to the Soft and Stable since it isn’t fusible like the pattern called for. I also added SF101 interfacing to the zipper strip pieces because I felt that they needed more stability to hold up against wear. I regret not adding interfacing to the handle to make it a little stiffer, but the pattern didn’t call for it and I didn’t think of it at the time!
All in all, a nice looking pouch, but, man, I had troubles following the instructions along the way and was genuinely surprised it turned out the way it did!
Finished Size: 10" x 14" (Large)
Pattern:The Maddilyn Pouch by This & That
Way back in 2020, I took part in a Round Robin project with a group of quilters I met at a quilt retreat. We each made a starter block for our own quilt and for 11 months mailed these blocks to each other, adding a block or border on to each one we received. In the end it produced a lap-sized quilt for each person.
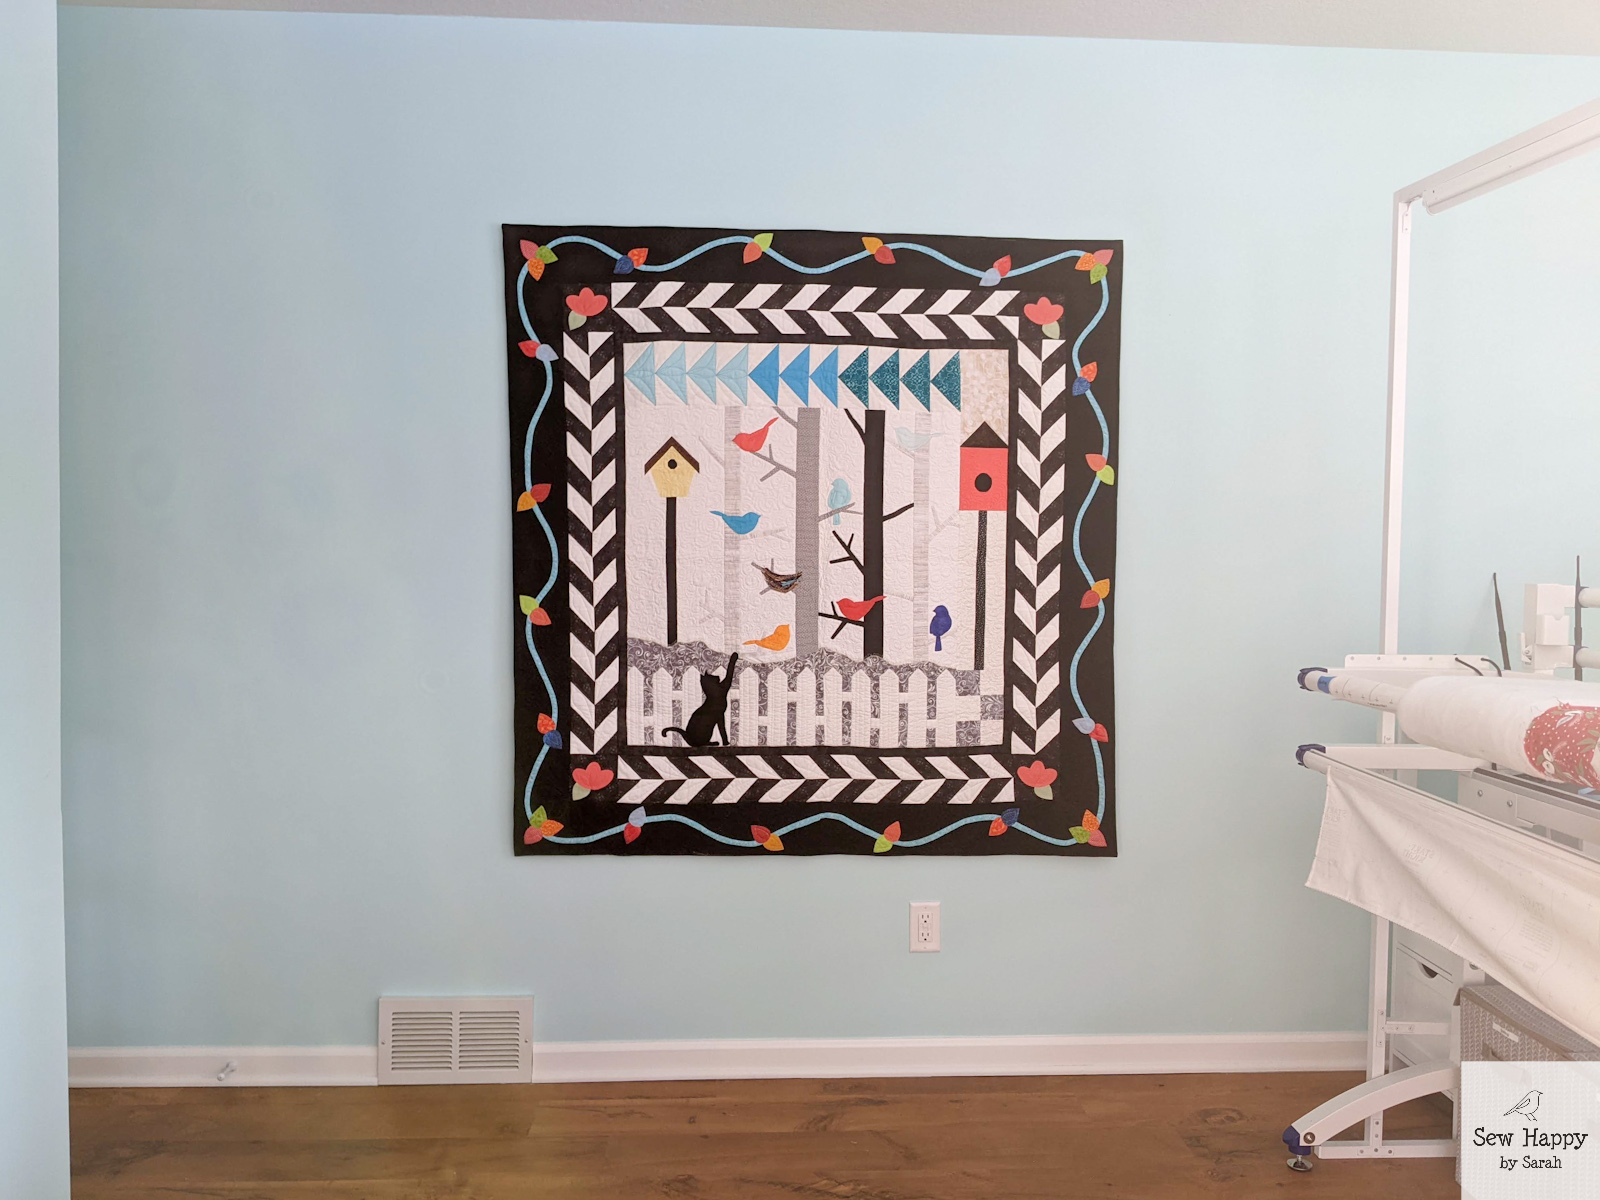
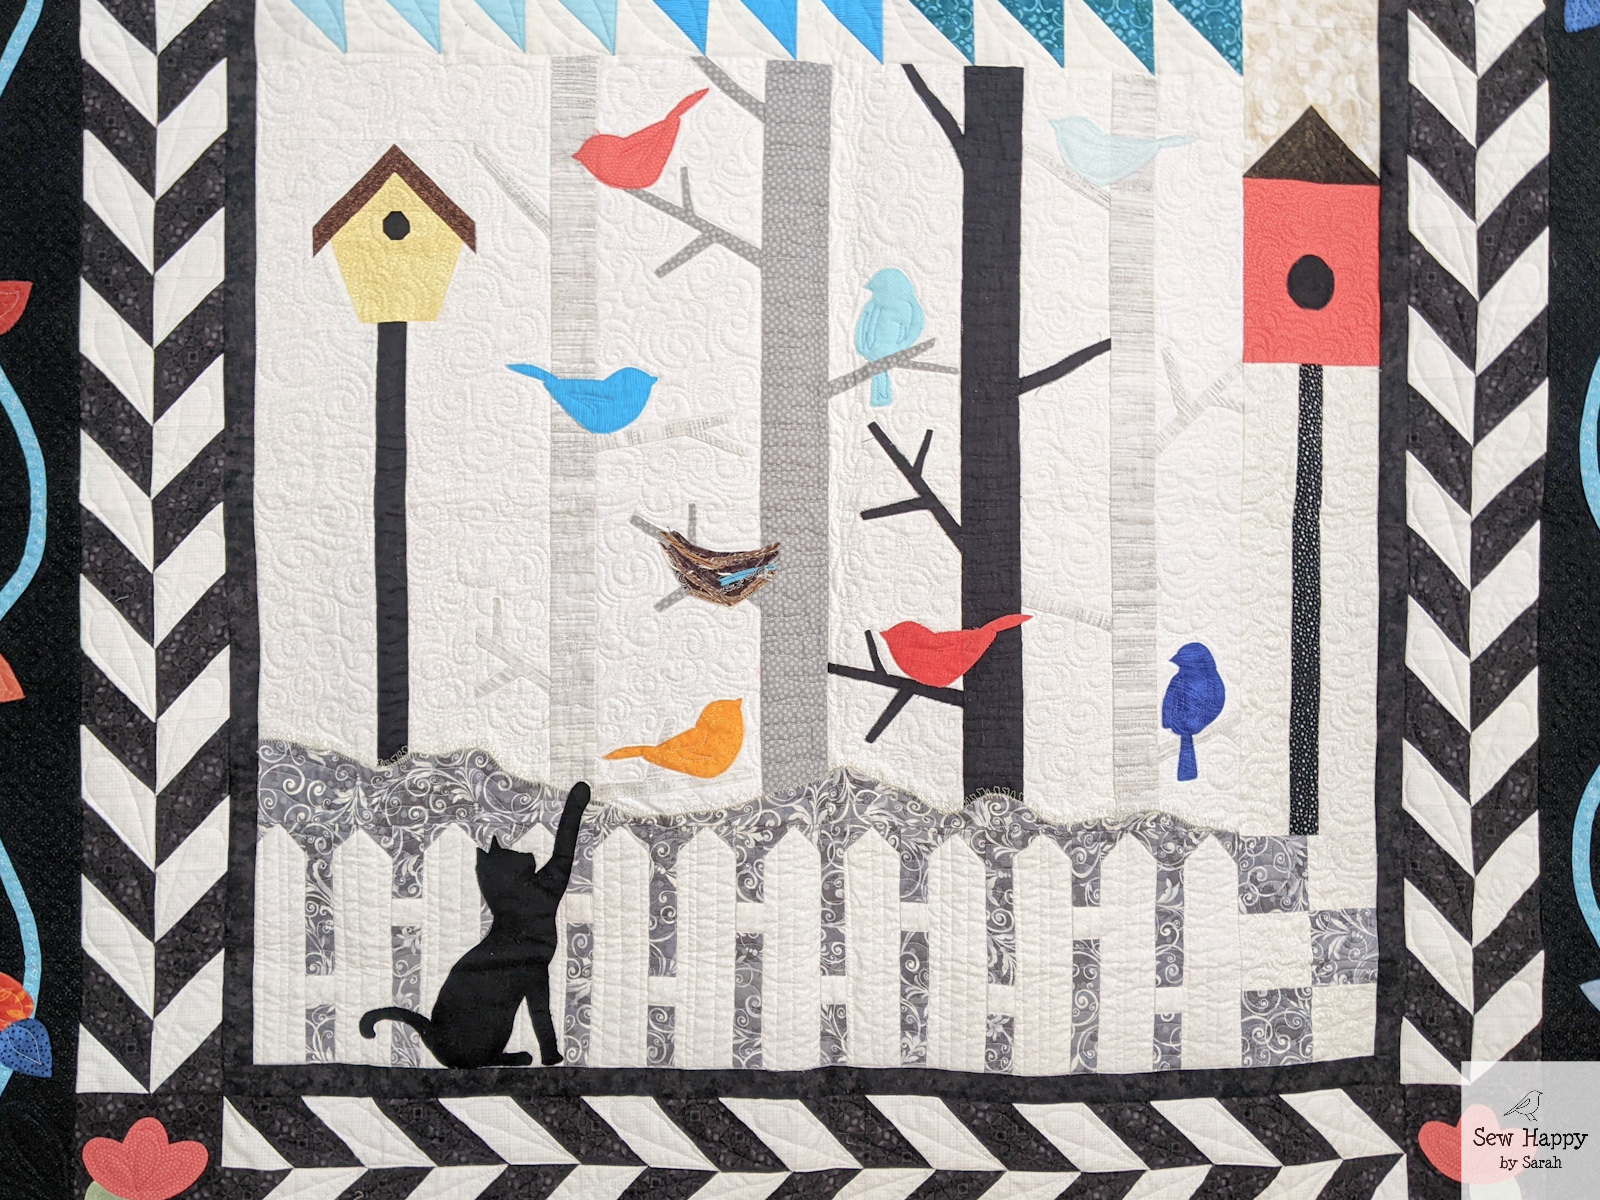
The quilt I ended up with turned out amazing! (Read more details about it here: Round Robin #9 – Mine!) It was one of the first quilts I quilted on my longarm back in February 2021, but afterwards it sat folded up waiting for binding. I was stalled because I couldn’t make up my mind on whether or not to add a hanging sleeve, where I would hang it up, or to just use it as a lap quilt on my couch. It eventually got buried under other projects and was forgotten about. Here we are in January 2023 and I finally decided this deserves to be on my wall of my new sewing room! The colors are perfect and it’s such a joy to look at.
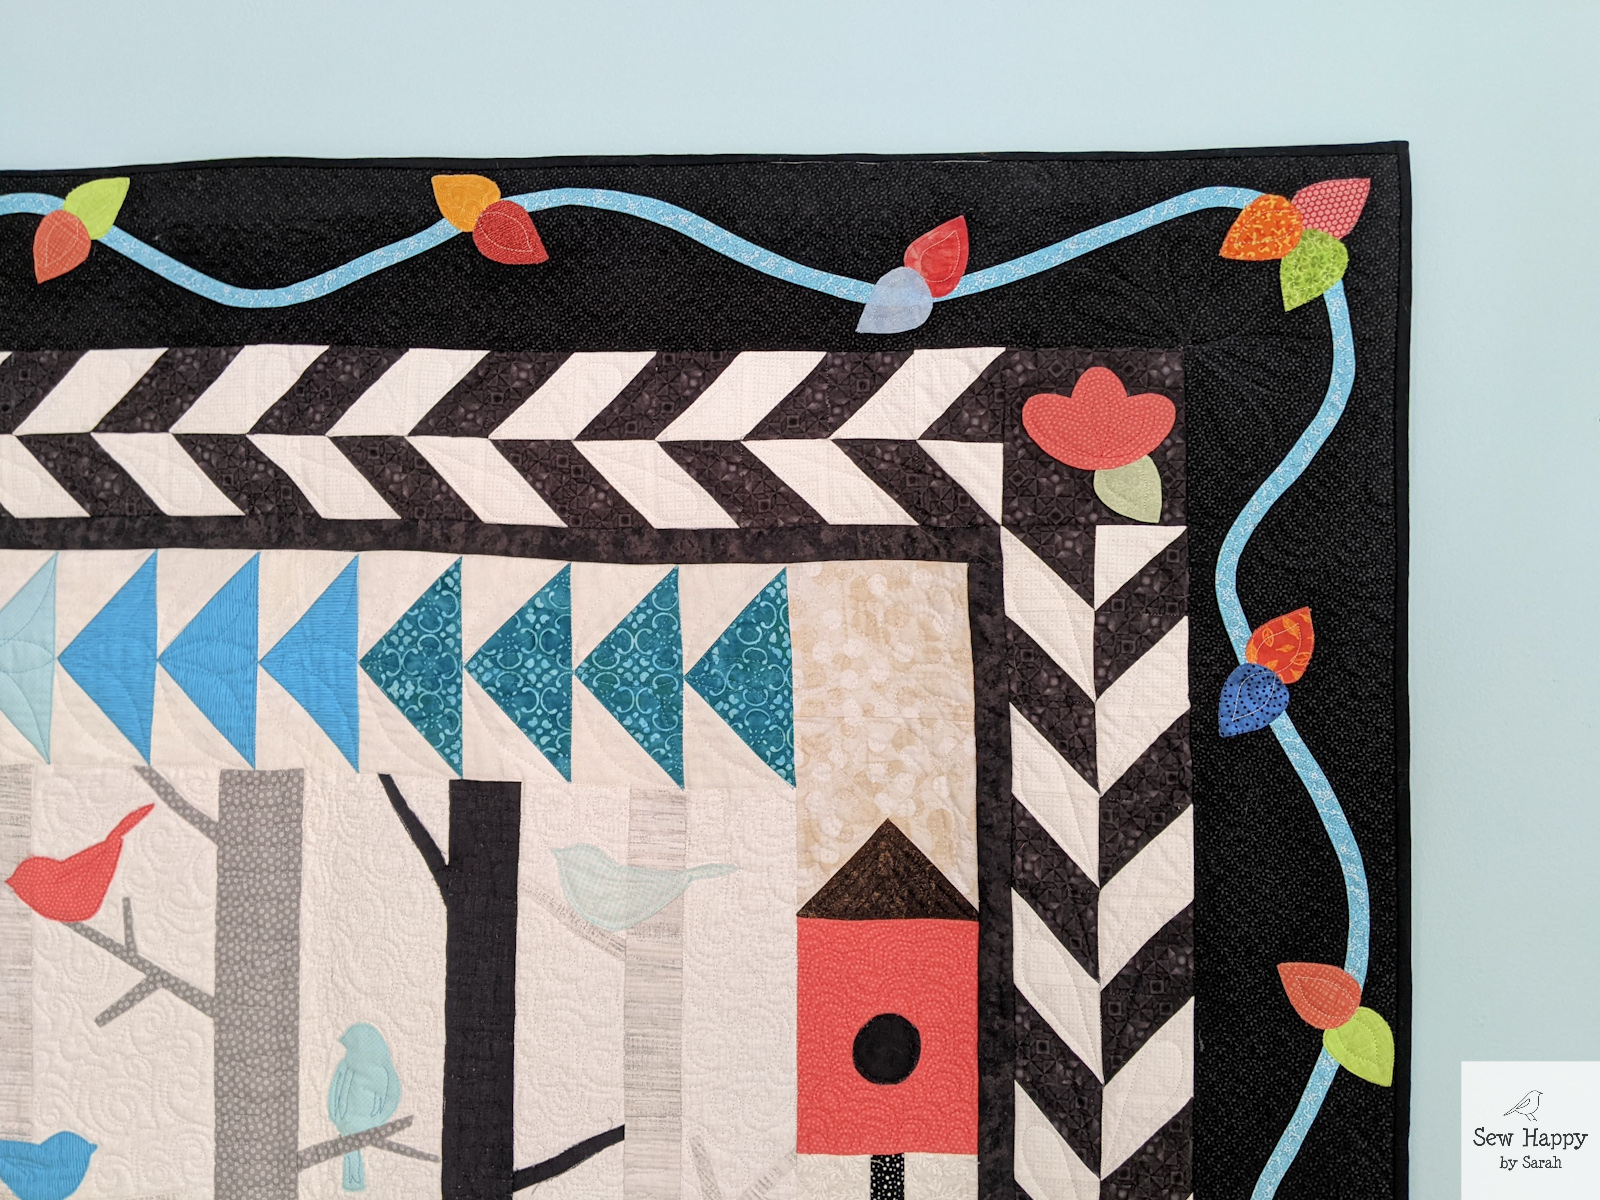
I had so much fun quilting this. I made a swirly background to represent a windy, snowy day. I added wing details for the birds and flowers, lines on the fence, and some enhancements to the borders.
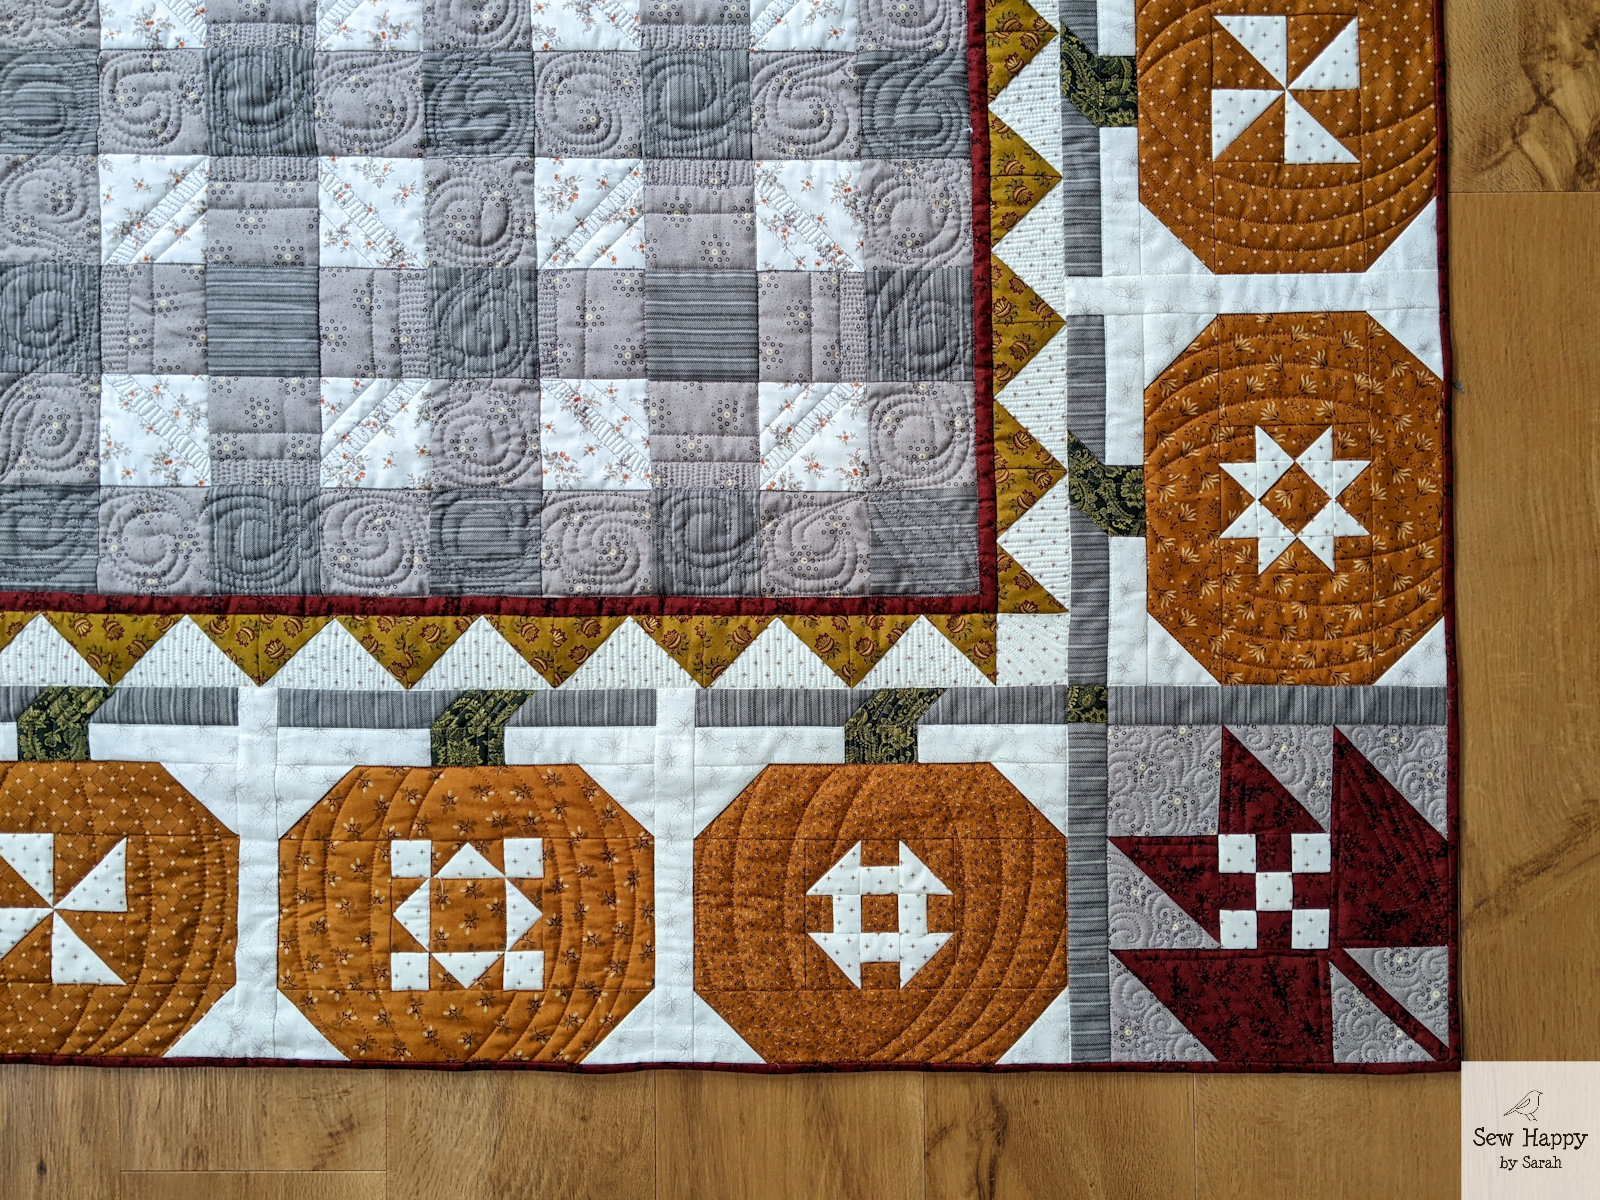
You could say I’m a season behind… or I’m working way ahead! Here’s the latest quilt I finished: Harvest Hill by Kim Diehl. I started this one in September at a quilt retreat, finished putting it together during October and then had to wait some weeks before my longarm was re-assembled in my new sewing room before I could quilt it. Nevertheless, it’s going to be a cozy quilt for next Fall!
When I purchased this quilt kit, I was drawn to the pumpkins and the playful quilt blocks inside each one. So much so that I have plans to use some of the leftover fabric to make some coordinating pumpkin pillows for my couch! I’d say the most unique part of this quilt from any I’ve done before is the center. It’s not one piece of buffalo plaid fabric: I cut out all of those squares and pieced them together! It’s an interesting effect, but if I had it to do over I would have added some other blocks between the plaid. More pumpkins?
I was also challenged in how to quilt the middle! I decided I wanted to dress it up a bit and added some swirls and geometric shapes that mimicked the pumpkins. It definitely took a lot of time. The pumpkins, on the other hand, went by quick once I thought up the curved line idea. I love how it gives them dimension!
For the first time I used flannel for a quilt backing. I used Autumn Gatherings Flannel by Primitive Gatherings and I love it! I definitely will try it on another. There was no difference in how I had to quilt it and it will be even more soft and warm!
I don’t know if it’s the “perfectly fall” colors or the intricate details in each scene, but I can just feel fall by looking at this cross stitch piece! This is the Autumn Band Sampler by Tiny Modernist and what a fun stitch it was! There was so much variety that it kept it interesting and the warmth of the colors kept it exciting.
To compliment the pattern, I chose Oatmeal 25 Count Lugana for the cloth and its modeled design adds a breezy look to the piece. I have to say, the frame is also perfect! It looks like a custom fit, but it wasn’t! I framed it with the Craig Frames Bauhaus 11×17 Inch Picture Frame in Distressed Light Brown from Amazon. I’m impressed that the color and distressed look of it coordinates so well. Not bad for an online purchase! (It appears Amazon no longer has it in the same color I got, but they have other colors in the same style).
I love the modern style of this pattern and really enjoyed stitching it!
I didn’t post much this summer for good reason. A renovation project consumed the last three months and my make-shift sewing area in my dining room was worse than my original sewing space! So, my pace for completing projects was drastically affected. Let me tell you what has been happening.
With my love of all types of sewing and having equipment, notions, and projects for each, my sewing space became cramped. Bringing a longarm into the room two years ago started the issue. Add to that, my daughter and her friend started sewing together and the three of us squeezing into the space was not ideal. So, I began to imagine a nice space where multiple people can sew at once and not be cramped together! Somewhere I would have room to longarm and also sew.
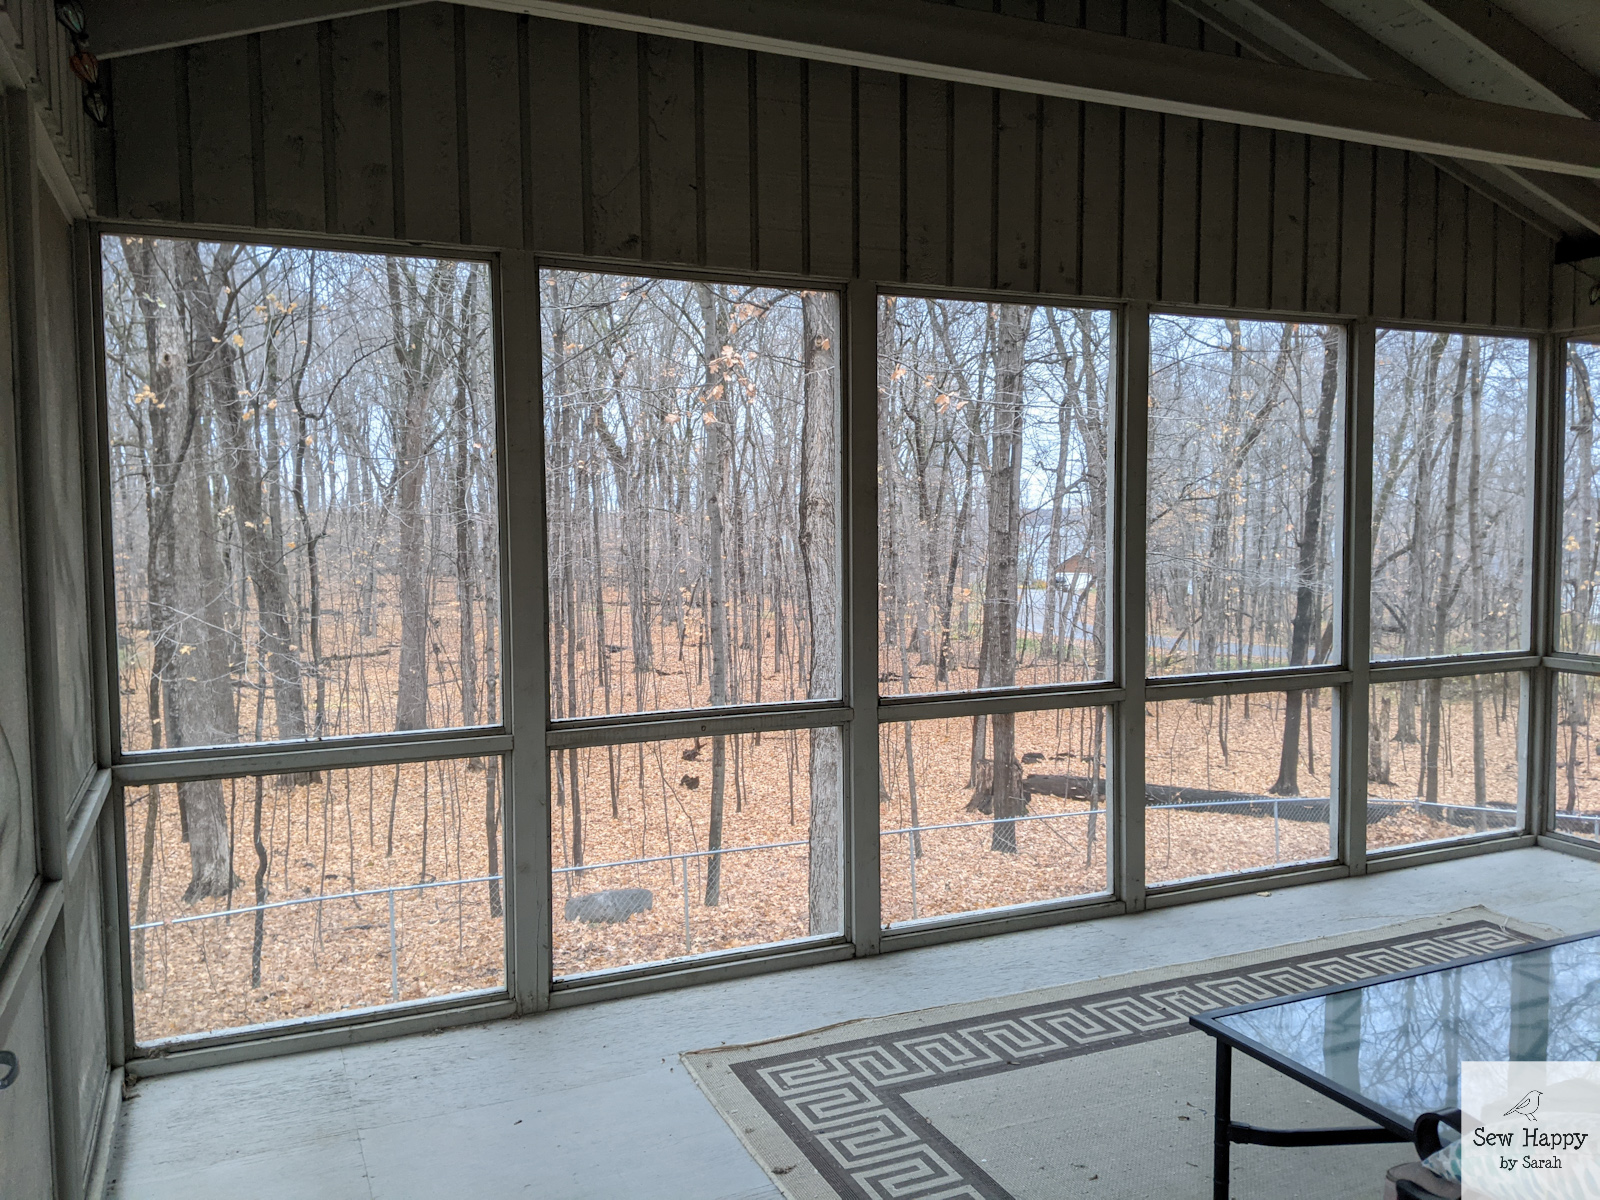
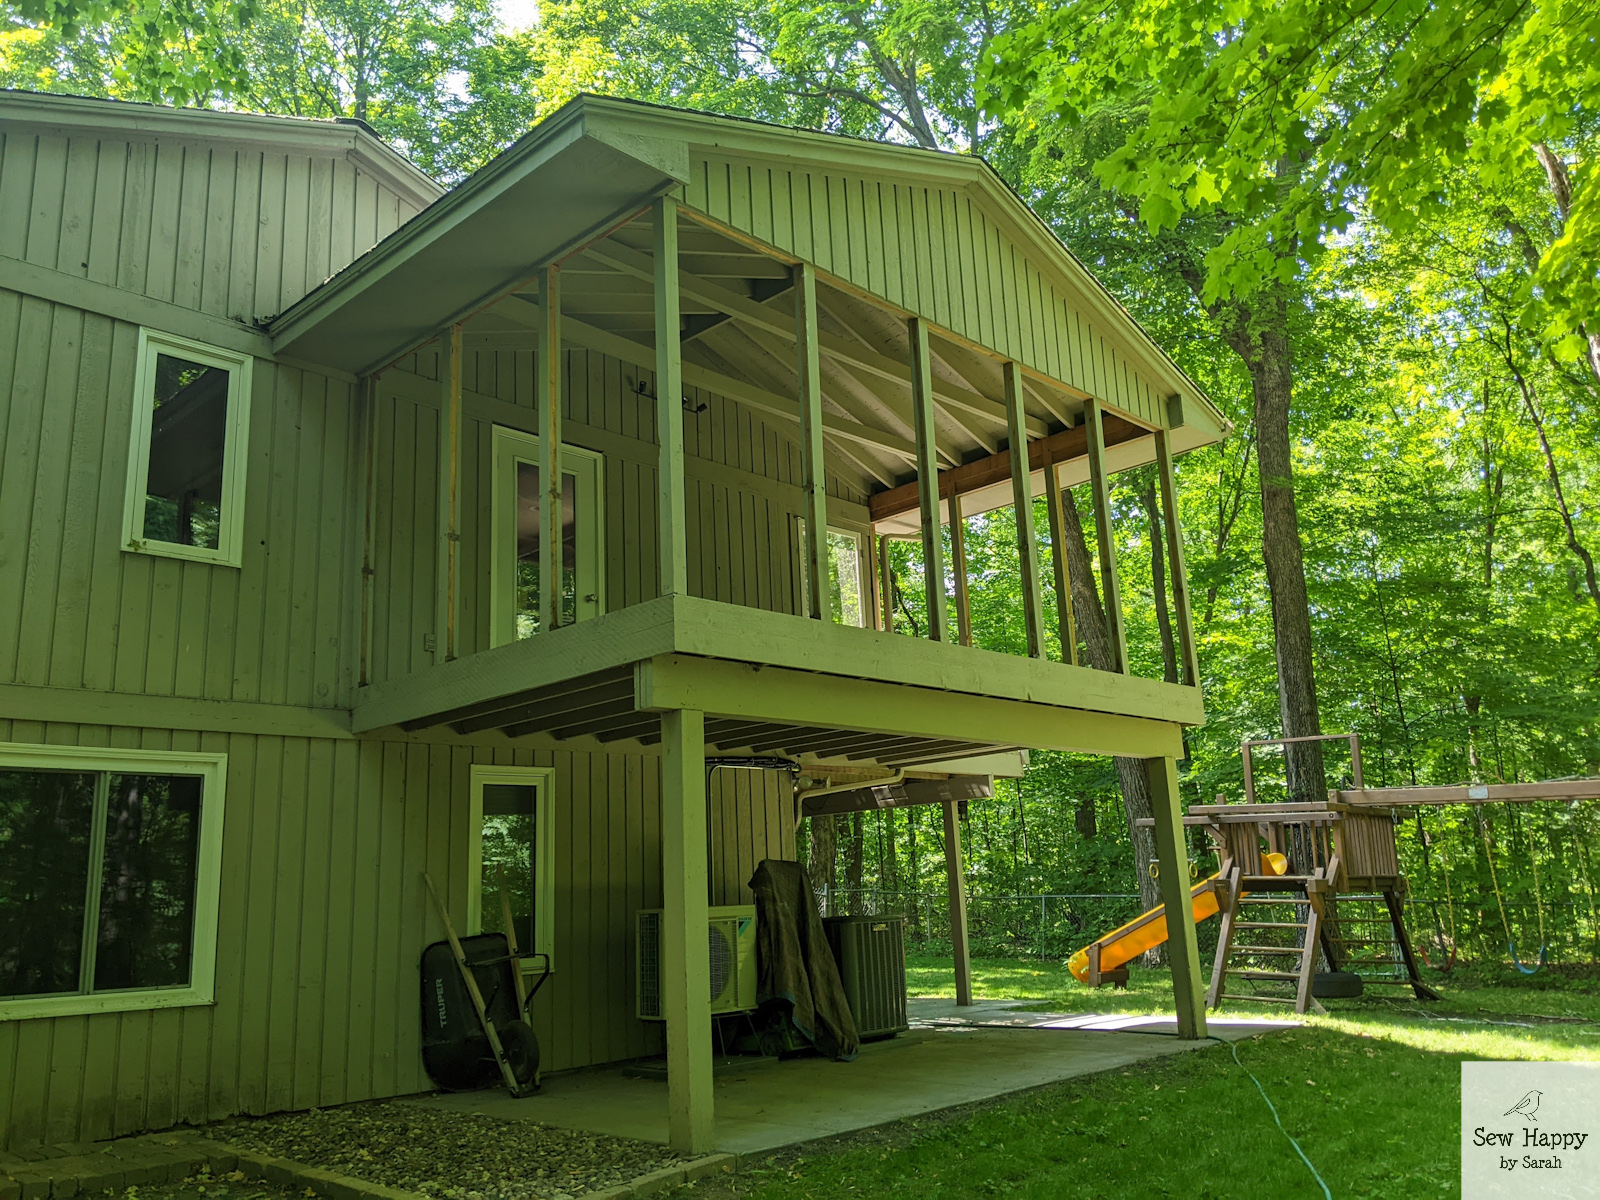
Last October, I started brainstorming ideas of how to get more space. Ideas of additions, knocking out walls and completely switching rooms were all entertained. In the end, we decided the best option would be to stay in the current room and finish off the screened porch attached to the sewing room into a four-season room and remove the wall between them to make one large room. We found we weren’t using the screened porch very often (a few times each summer) and it was completely useless during the winter! This would mean a 10′ x 17′ addition to my 11′ x 14′ room!
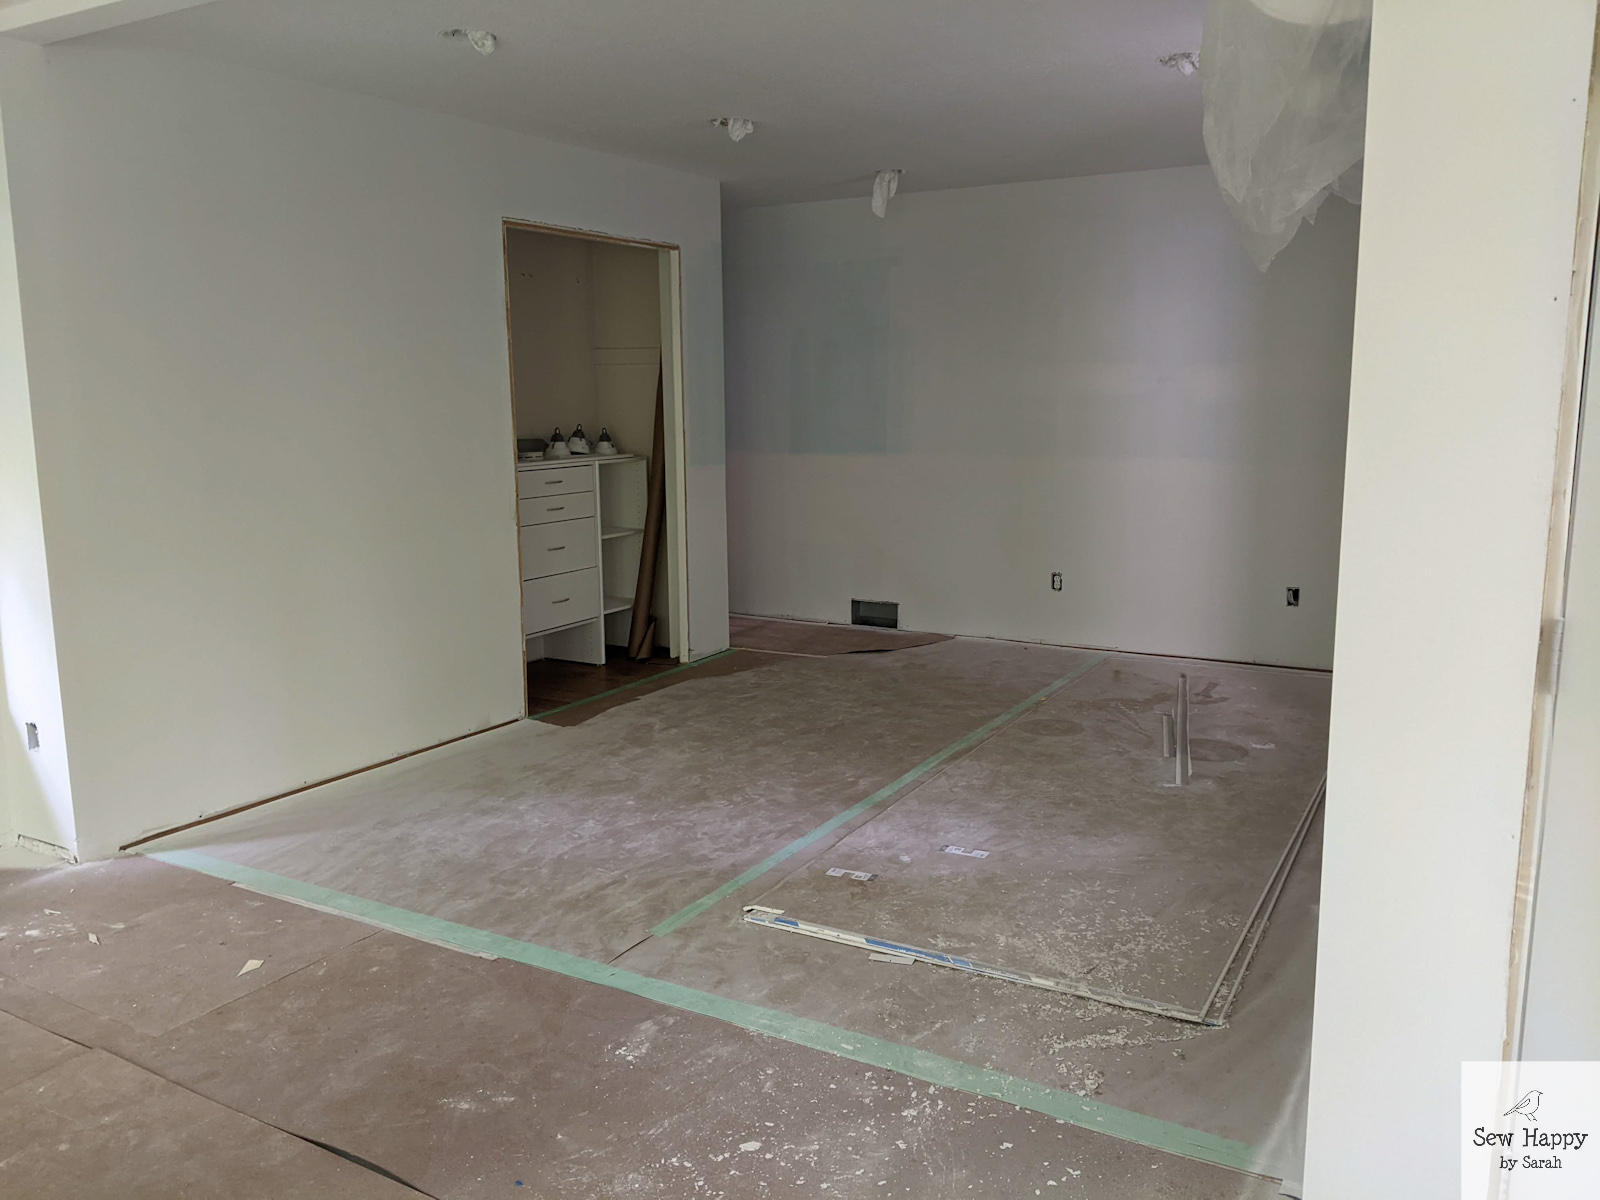
Screened porch:
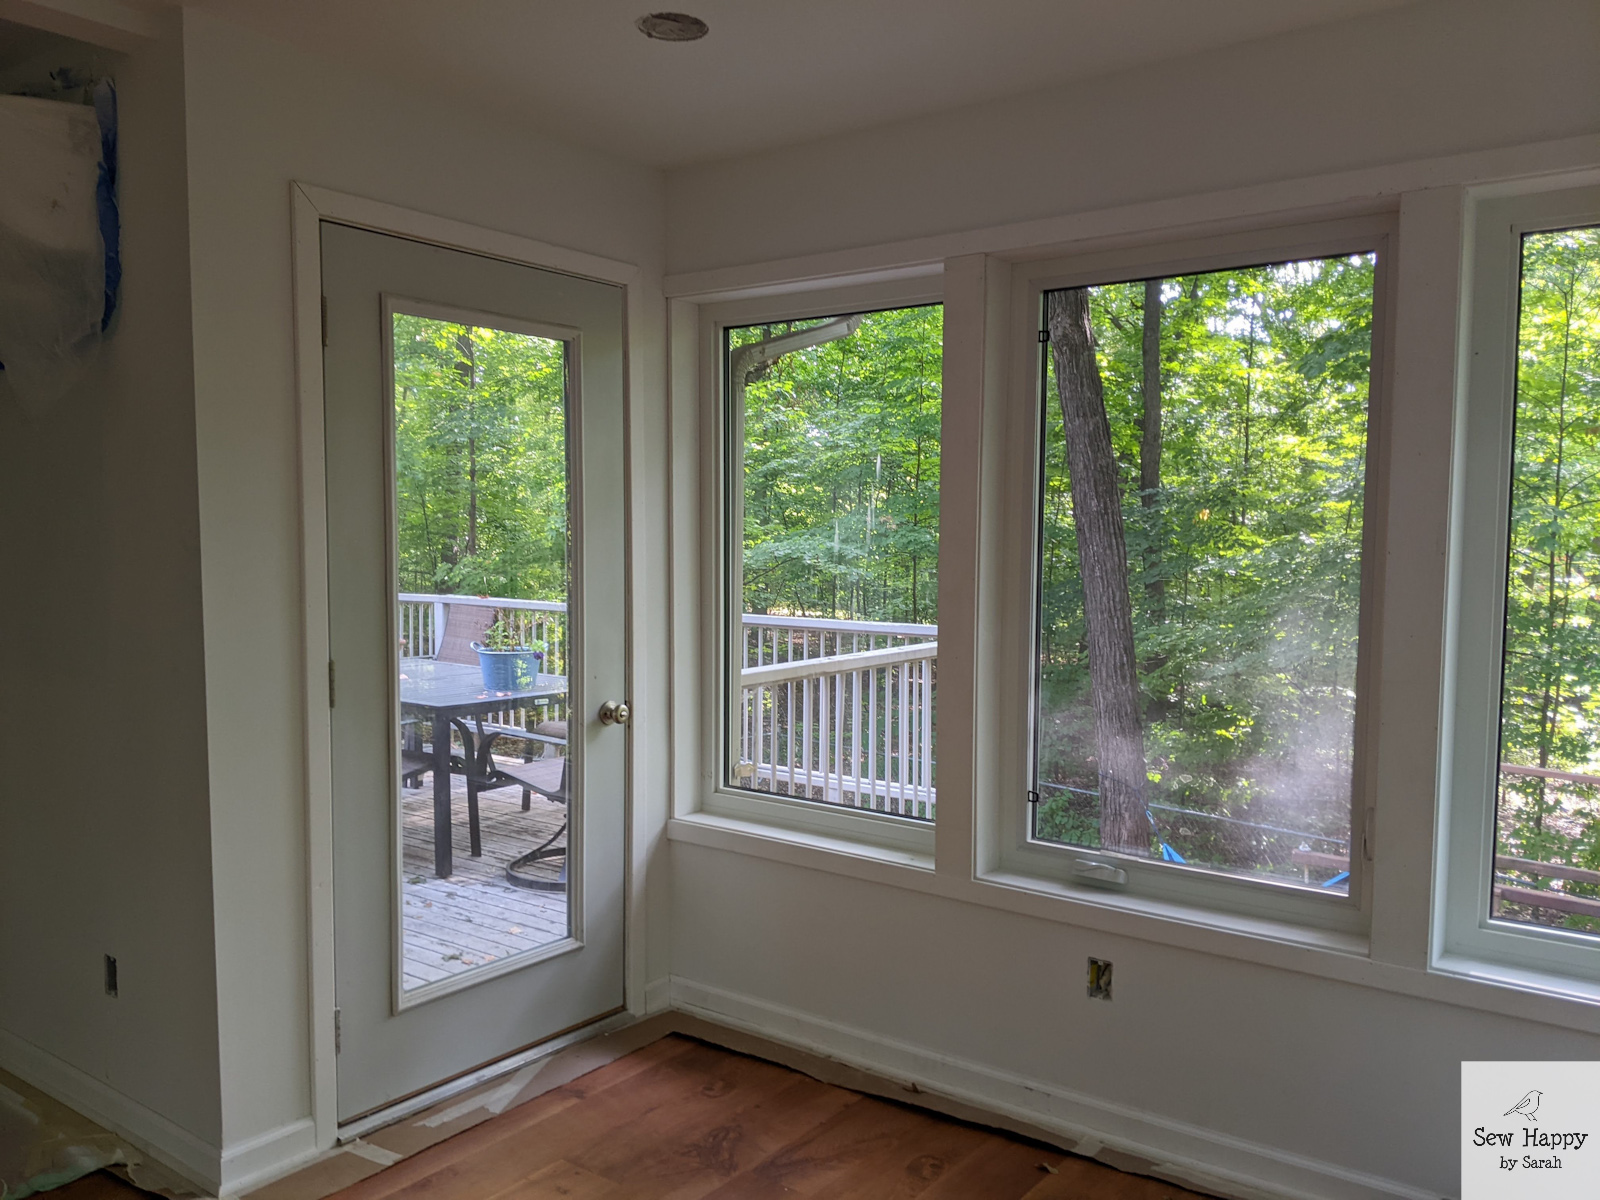
Door to sewing roomDoor to deck
After signing a contract with a remodeling company in January 2022, the waiting game began. Due to supply chain issues, we found out ordering windows for the new room was going to be our biggest hurdle. It didn’t make sense to start the project until the windows arrived, so that set the project timeline. We were quoted a 4-month lead time on the windows and sure enough they arrived at the end of May 2022 as expected.
The Plan
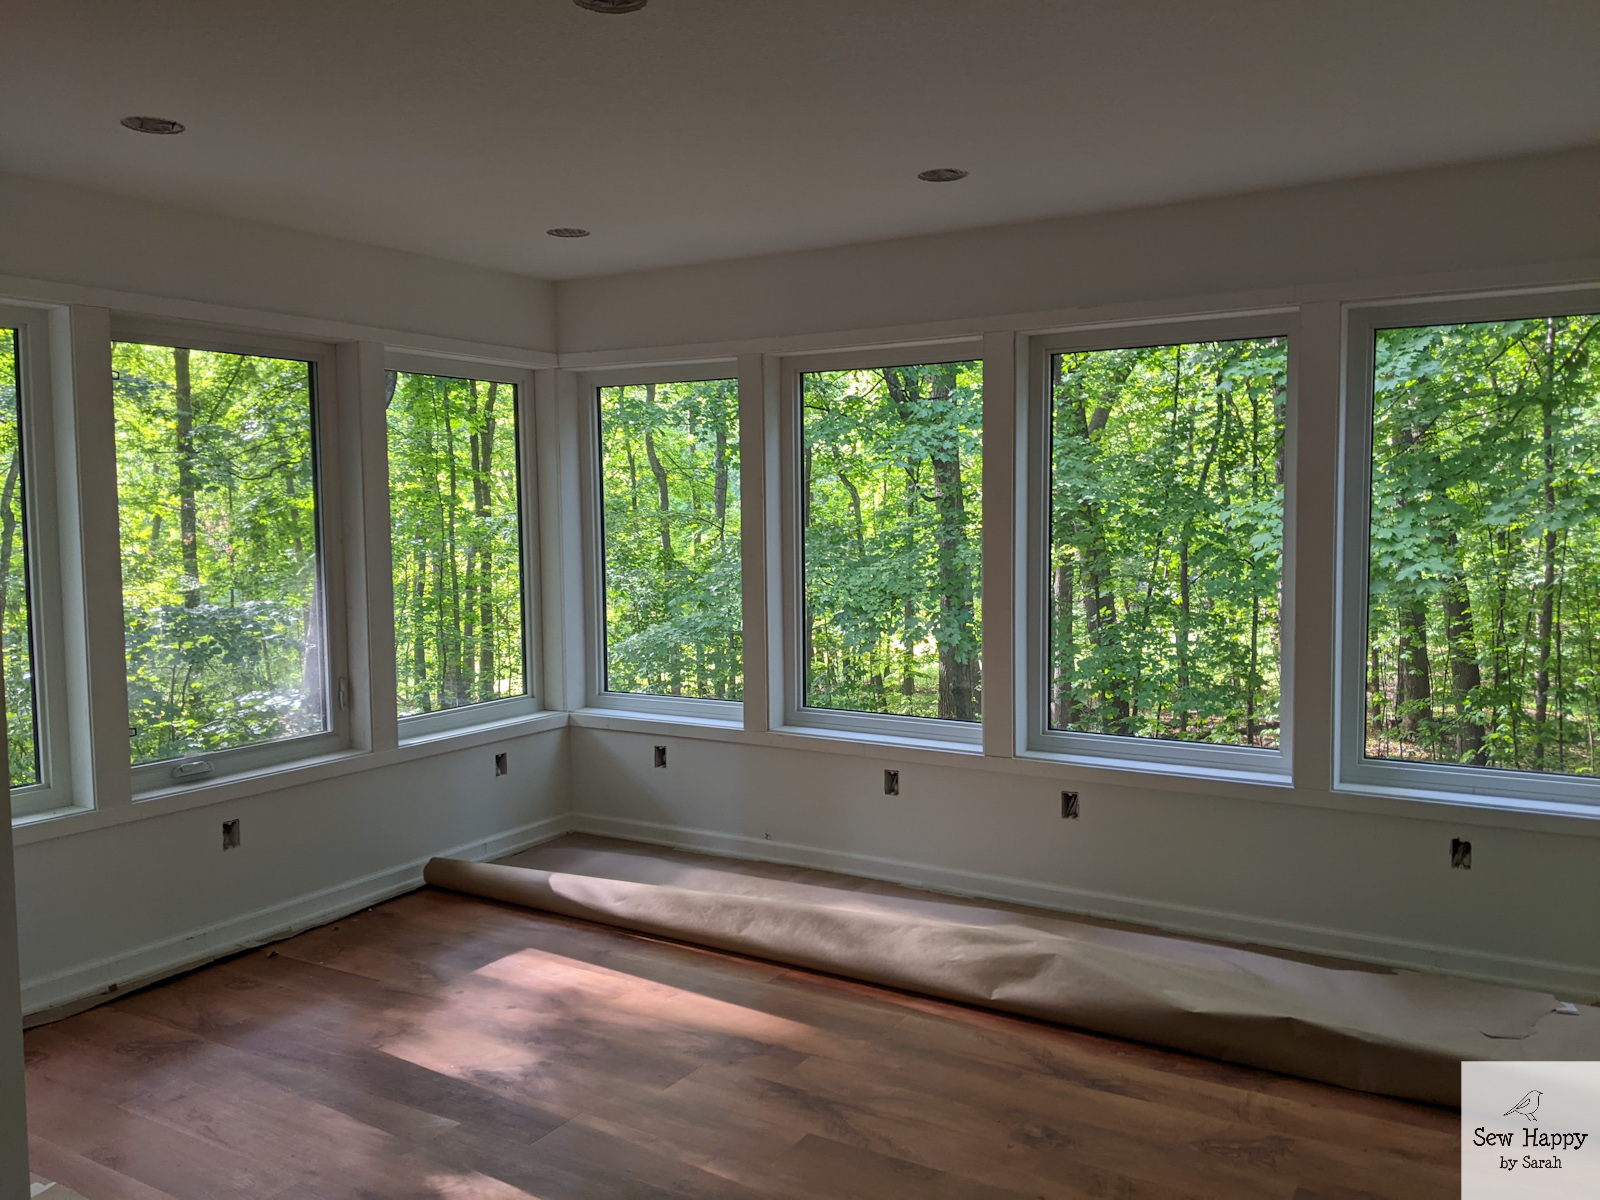
The plan was to frame the new walls in the porch, install the windows (11 of them to keep that sunroom type of feel!), and then tear down the wall between the rooms. The same luxury vinyl plank flooring from the existing sewing room would be used in the porch area and both rooms would have the same trim and paint. Electrical outlets would be added in the porch as well as can lights to match the existing room.
I created a floor plan to determine how I would use this new space. As you can see, I have more than enough furniture to put in it! We’ll see how it turns out when the project is complete, but these are my thoughts:
Original room will have the longarm in the same location, but since there will be more room I can extend the frame from 7′ to 12′ so I can quilt larger quilts.
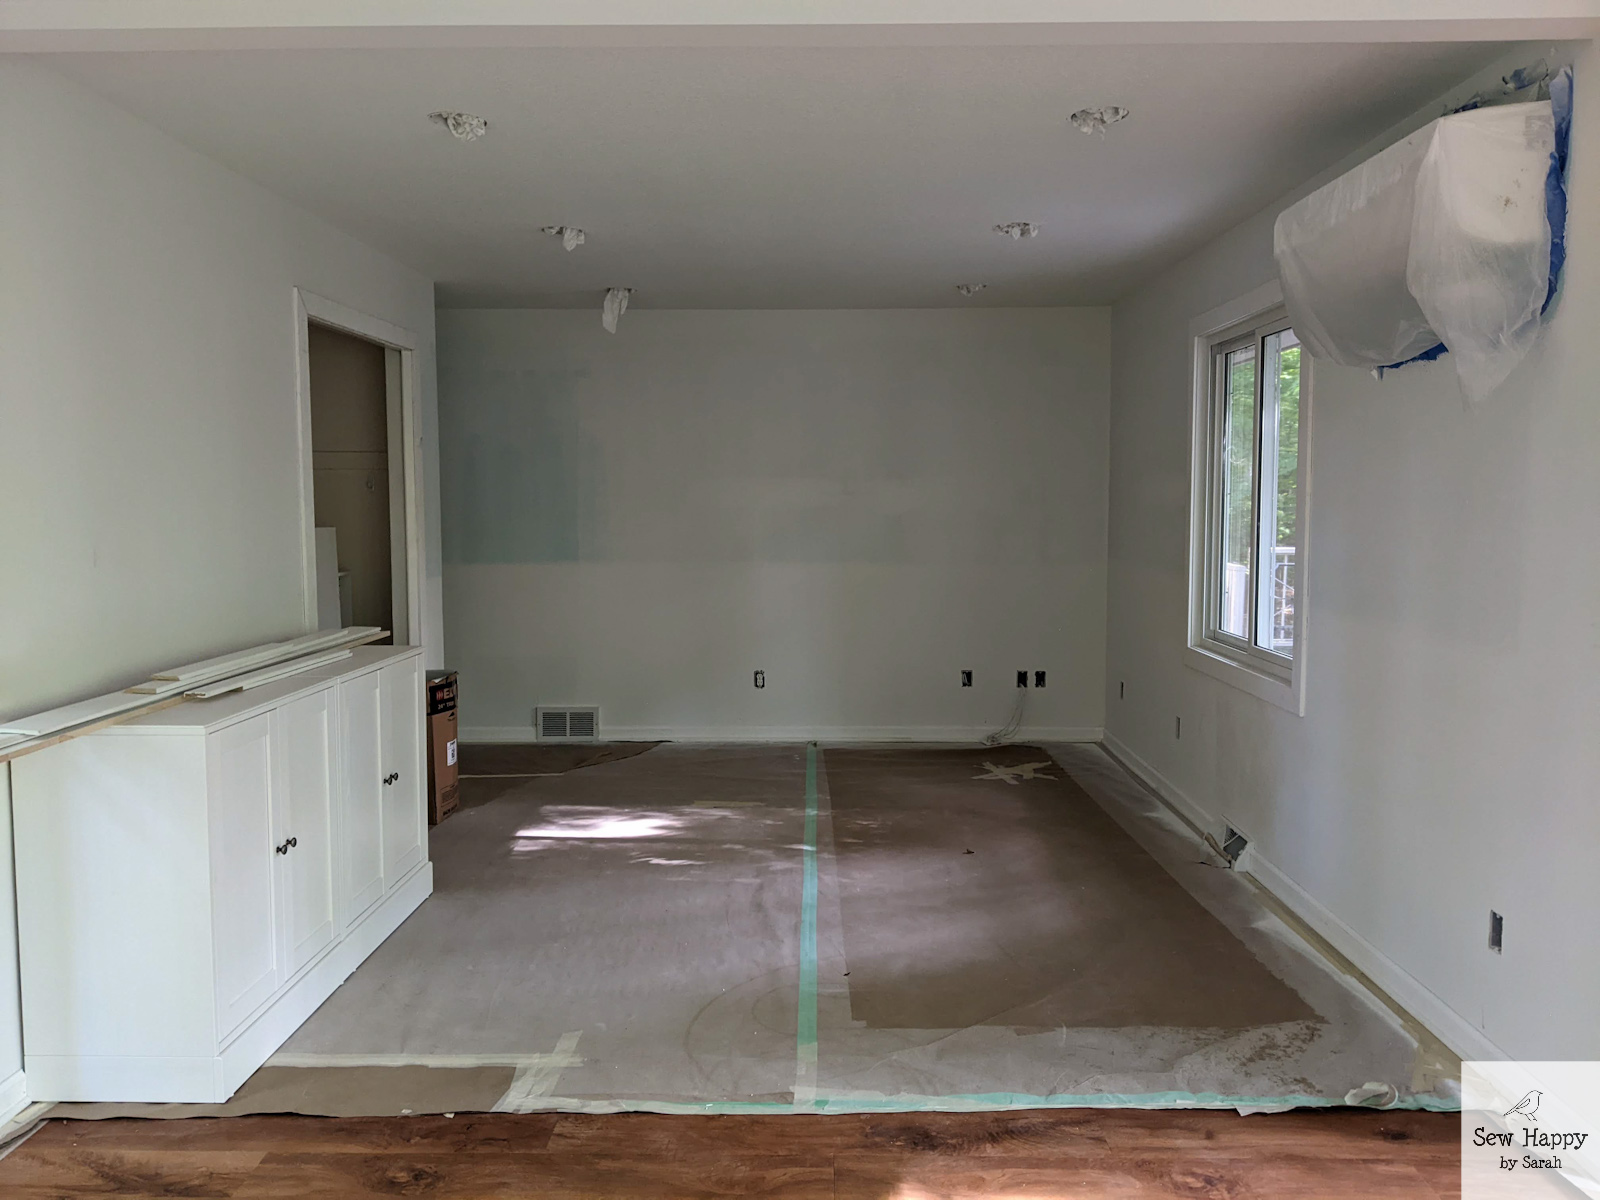
Existing closet will remain the same and an additional storage cabinet will be added on the wall next to it.
The new area will hold all of the sewing stations (4), corner computer desk & work station, cutting table, and ironing table.
Renovation Tour
It’s now September 2022 and the project is still going… We’re in the home stretch and I’d like to think there are only a few weeks left but everytime I say that something gets delayed! Enjoy the following tour of the renovation progress so far:
January 2022
We determined the best way to heat/cool the new room would be to install a Mini Split heating/cooling unit. The existing sewing room didn’t get much heat or air conditioning because of its location in the house, so this unit would greatly benefit both rooms. We had it installed near the wall that was going to be removed so it would be in a central location to both areas. We did this in January since it wasn’t dependent on the rest of the construction.
Mini Split unit is installed
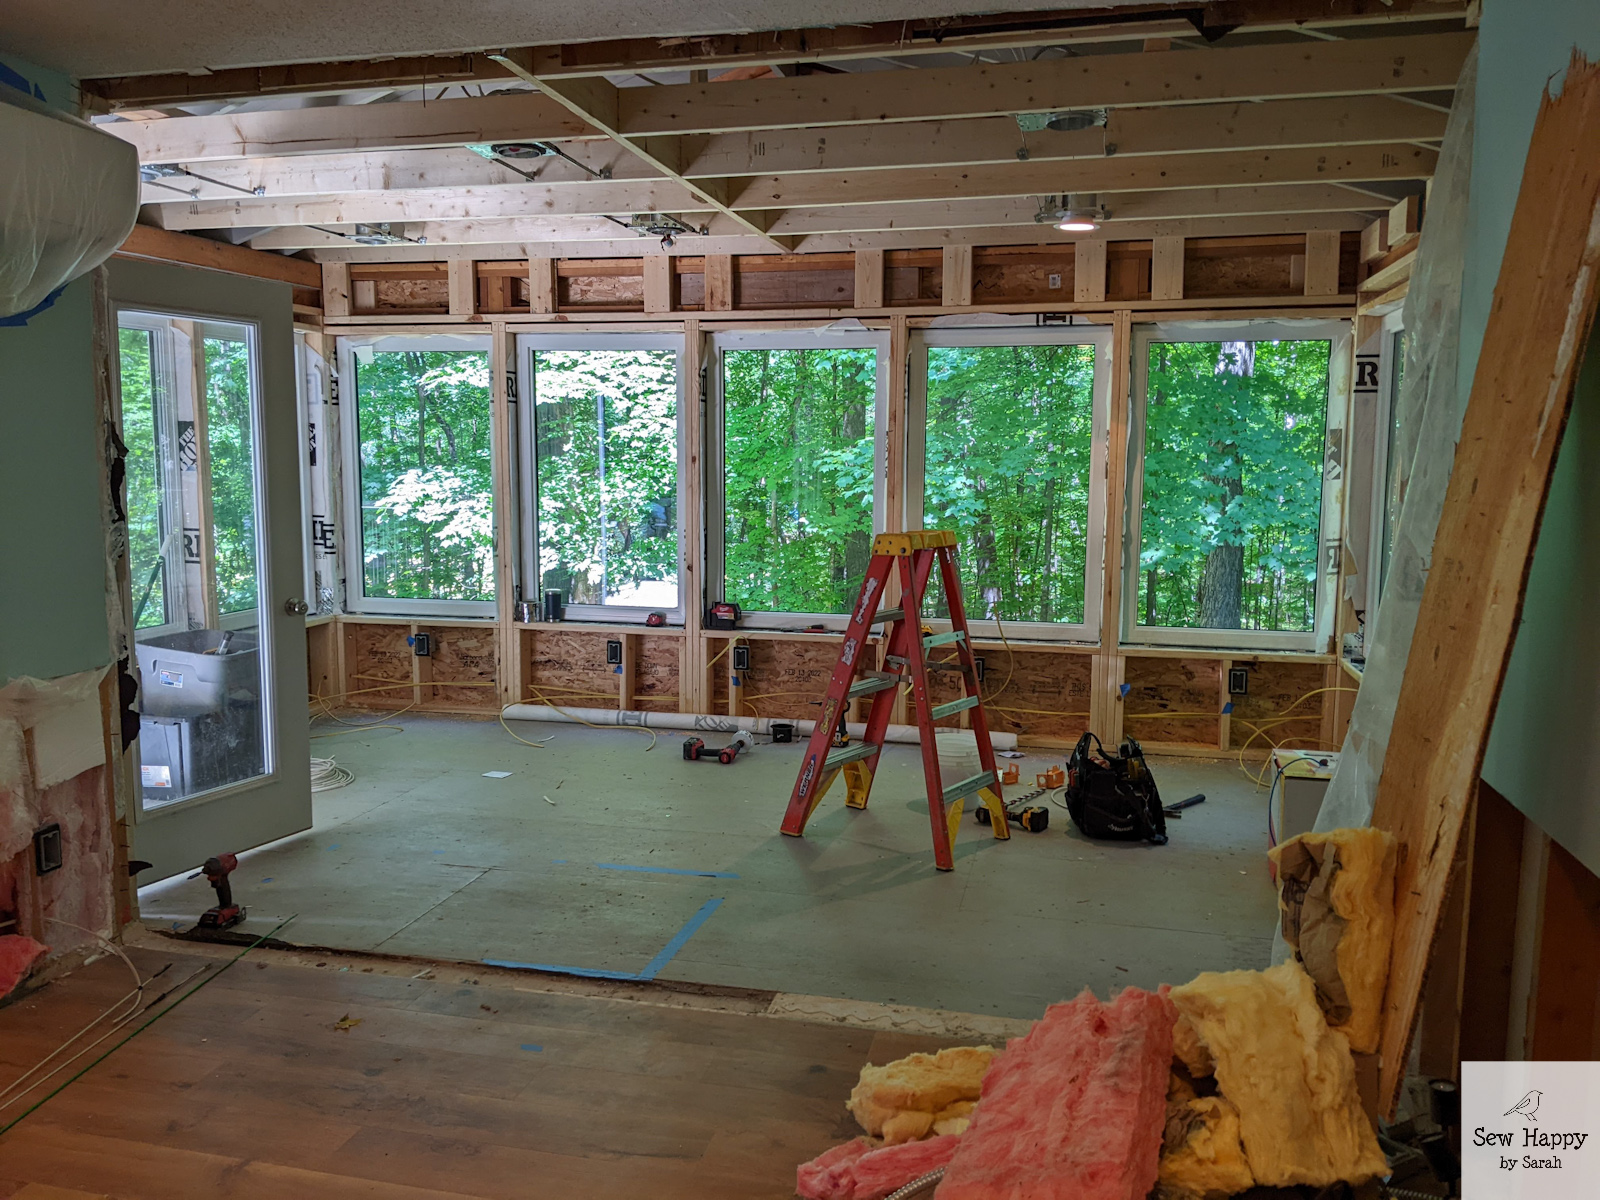
June 2022
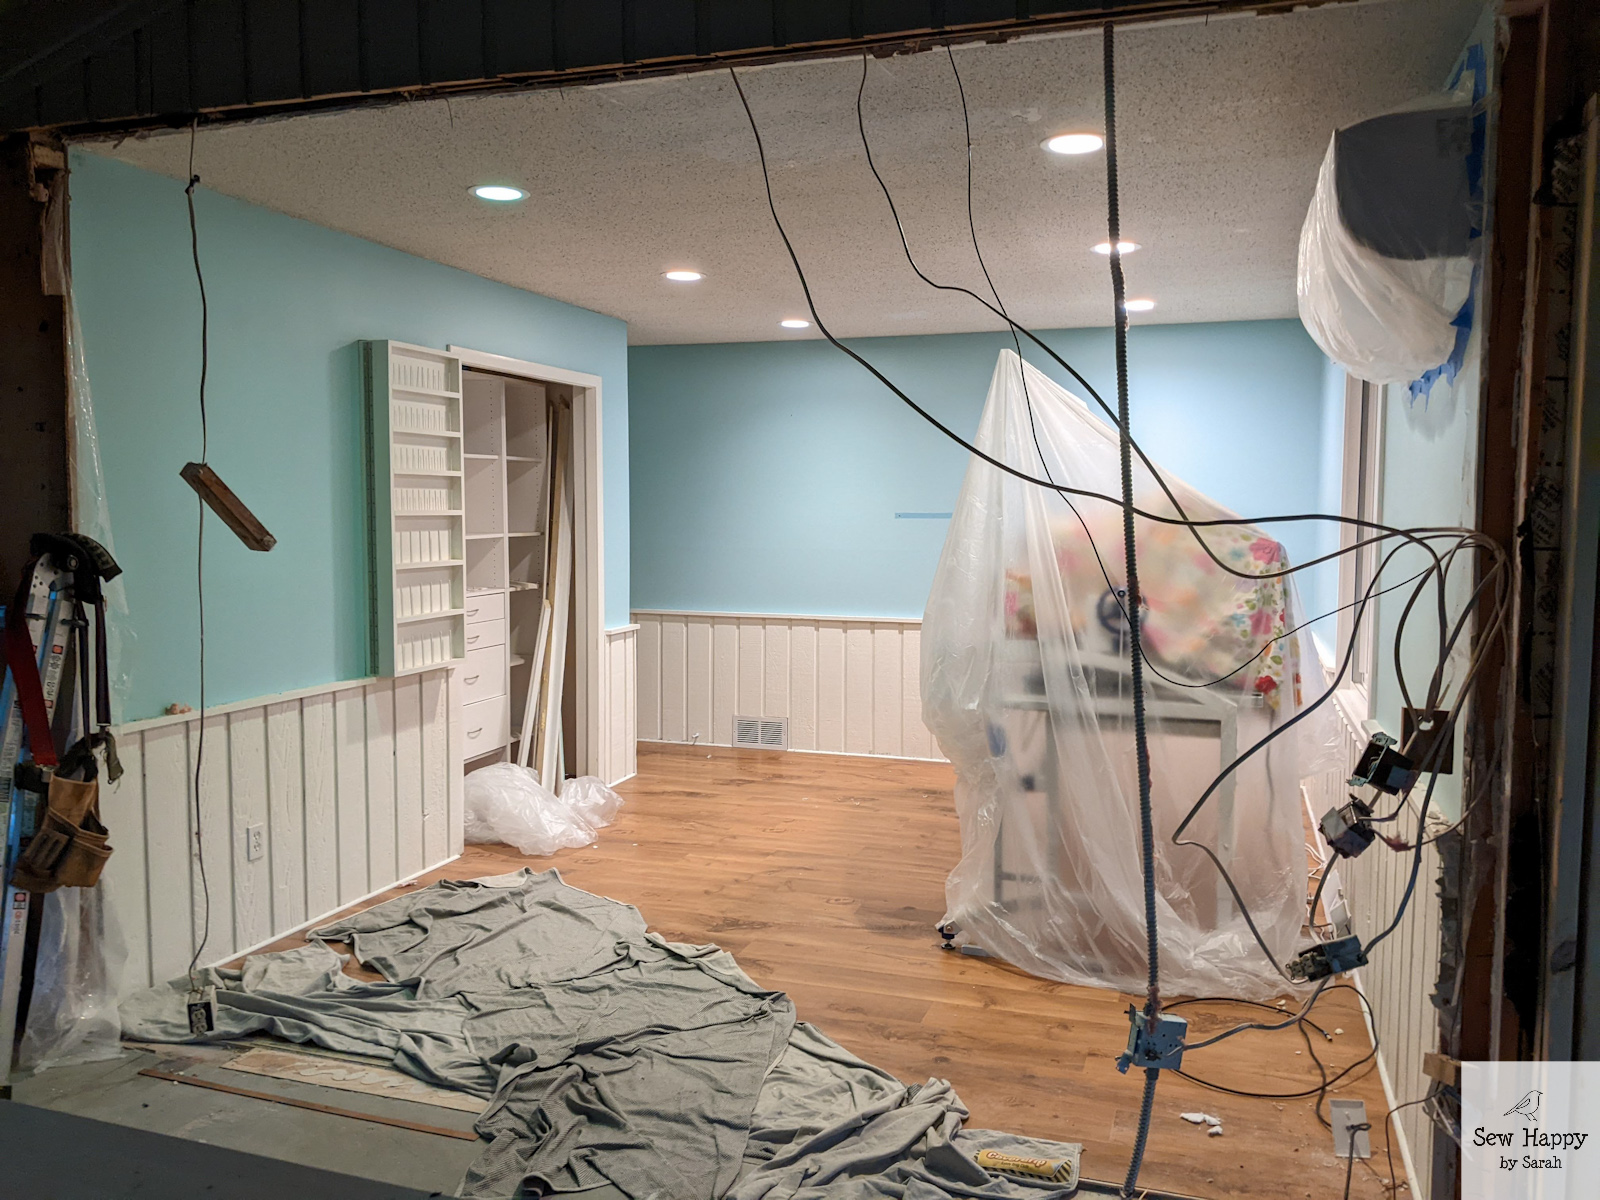
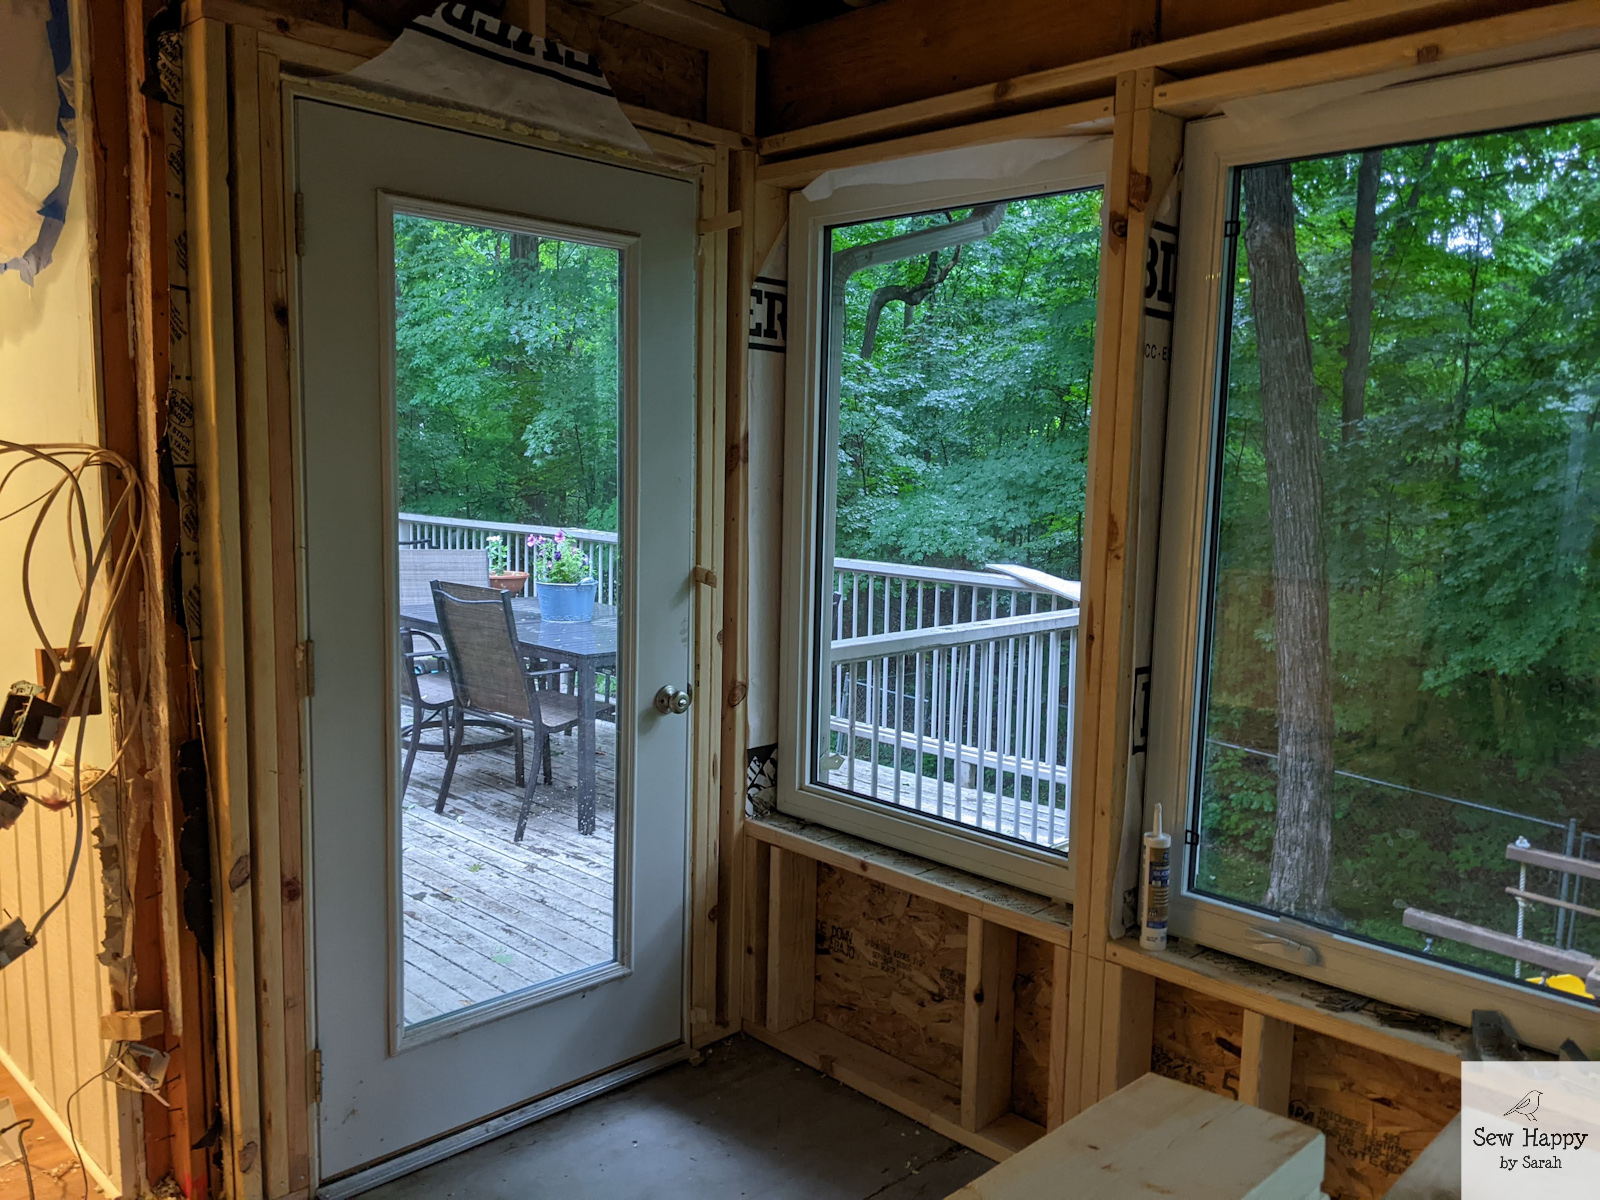
Construction begins!
Screens are removedWalls are framedWindow installationWall is torn down between the roomsDoor that was between the two rooms is moved to replace the screen door to the deckWainscotting is removed in the original sewing room
At this point I took the longarm out of the room. Yes, it’s in bunch of pieces now and it’s going to be an adventure putting the whole frame back together eventually!
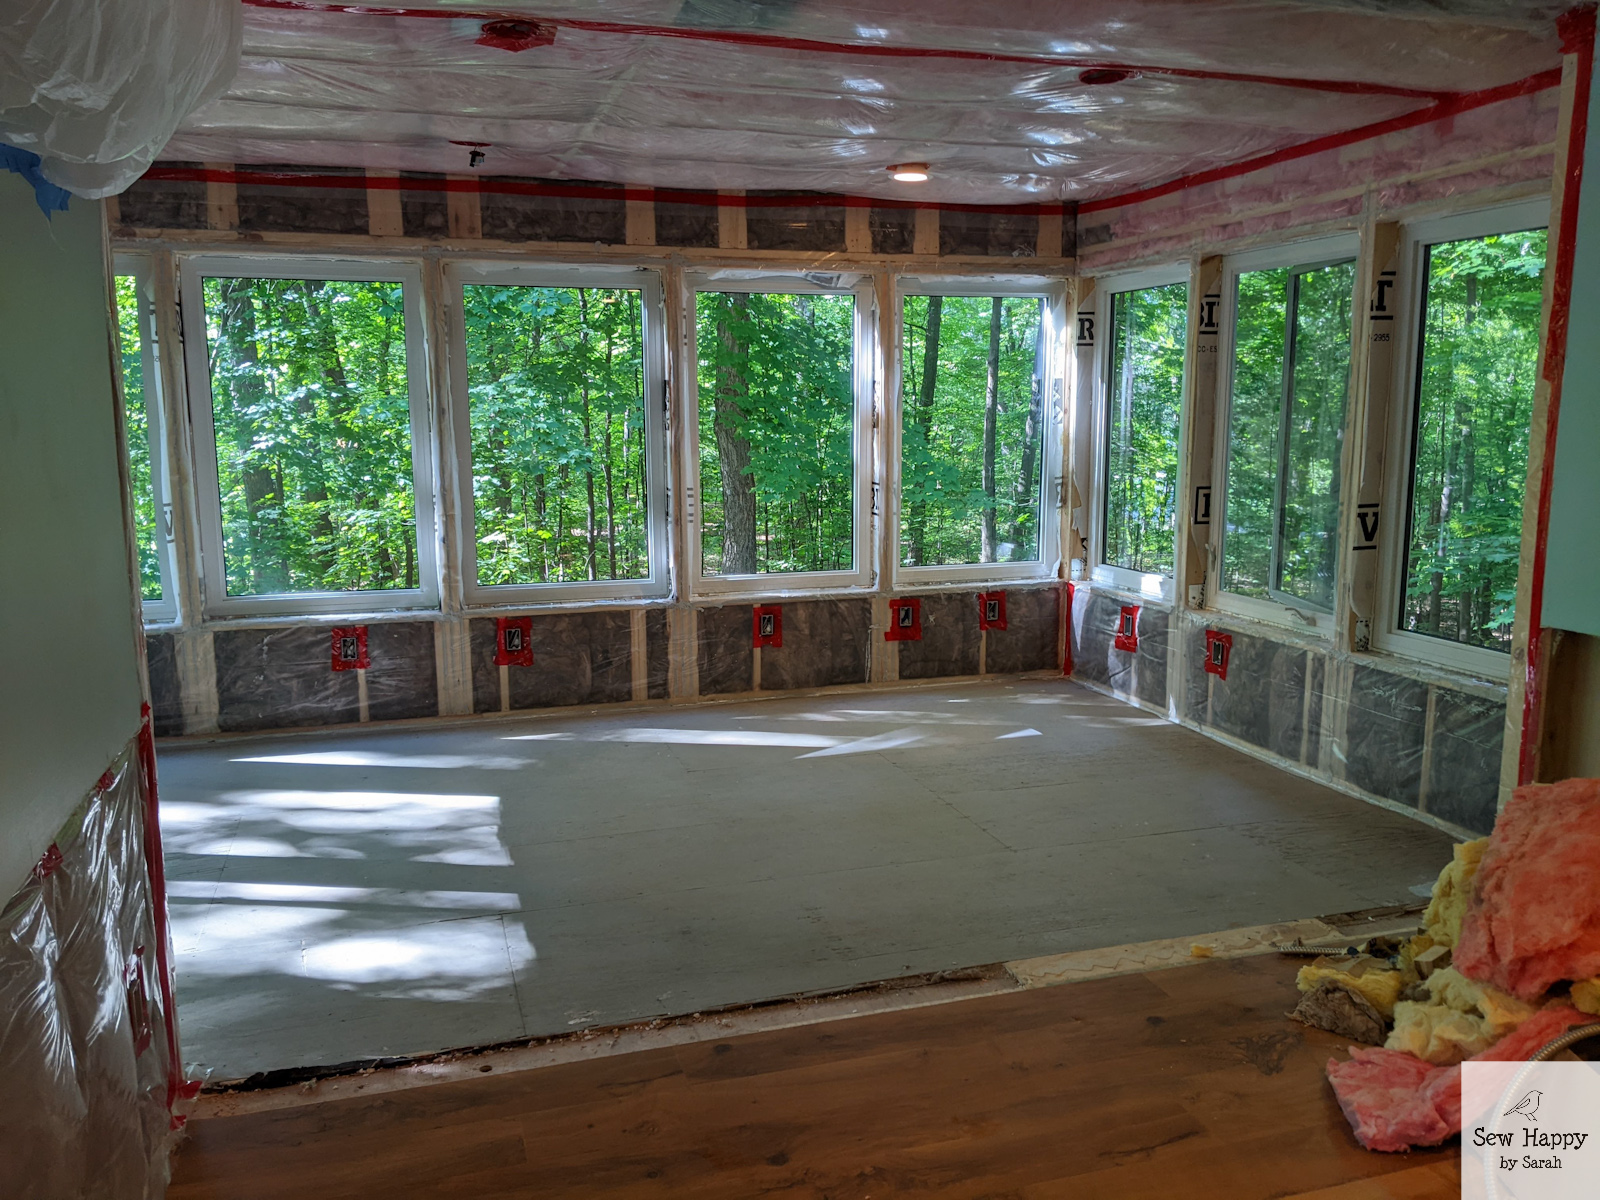
July 2022
Ceiling is framed, electric outlets are added, and six can lights are installed
Besides the 12 outlets I had them add (I think they thought I was a little crazy!), the electricians also added some ethernet ports which will be a great improvement over the ethernet cables I previously would run across the room to my computer!
Wall, ceiling and floor insulation is installed
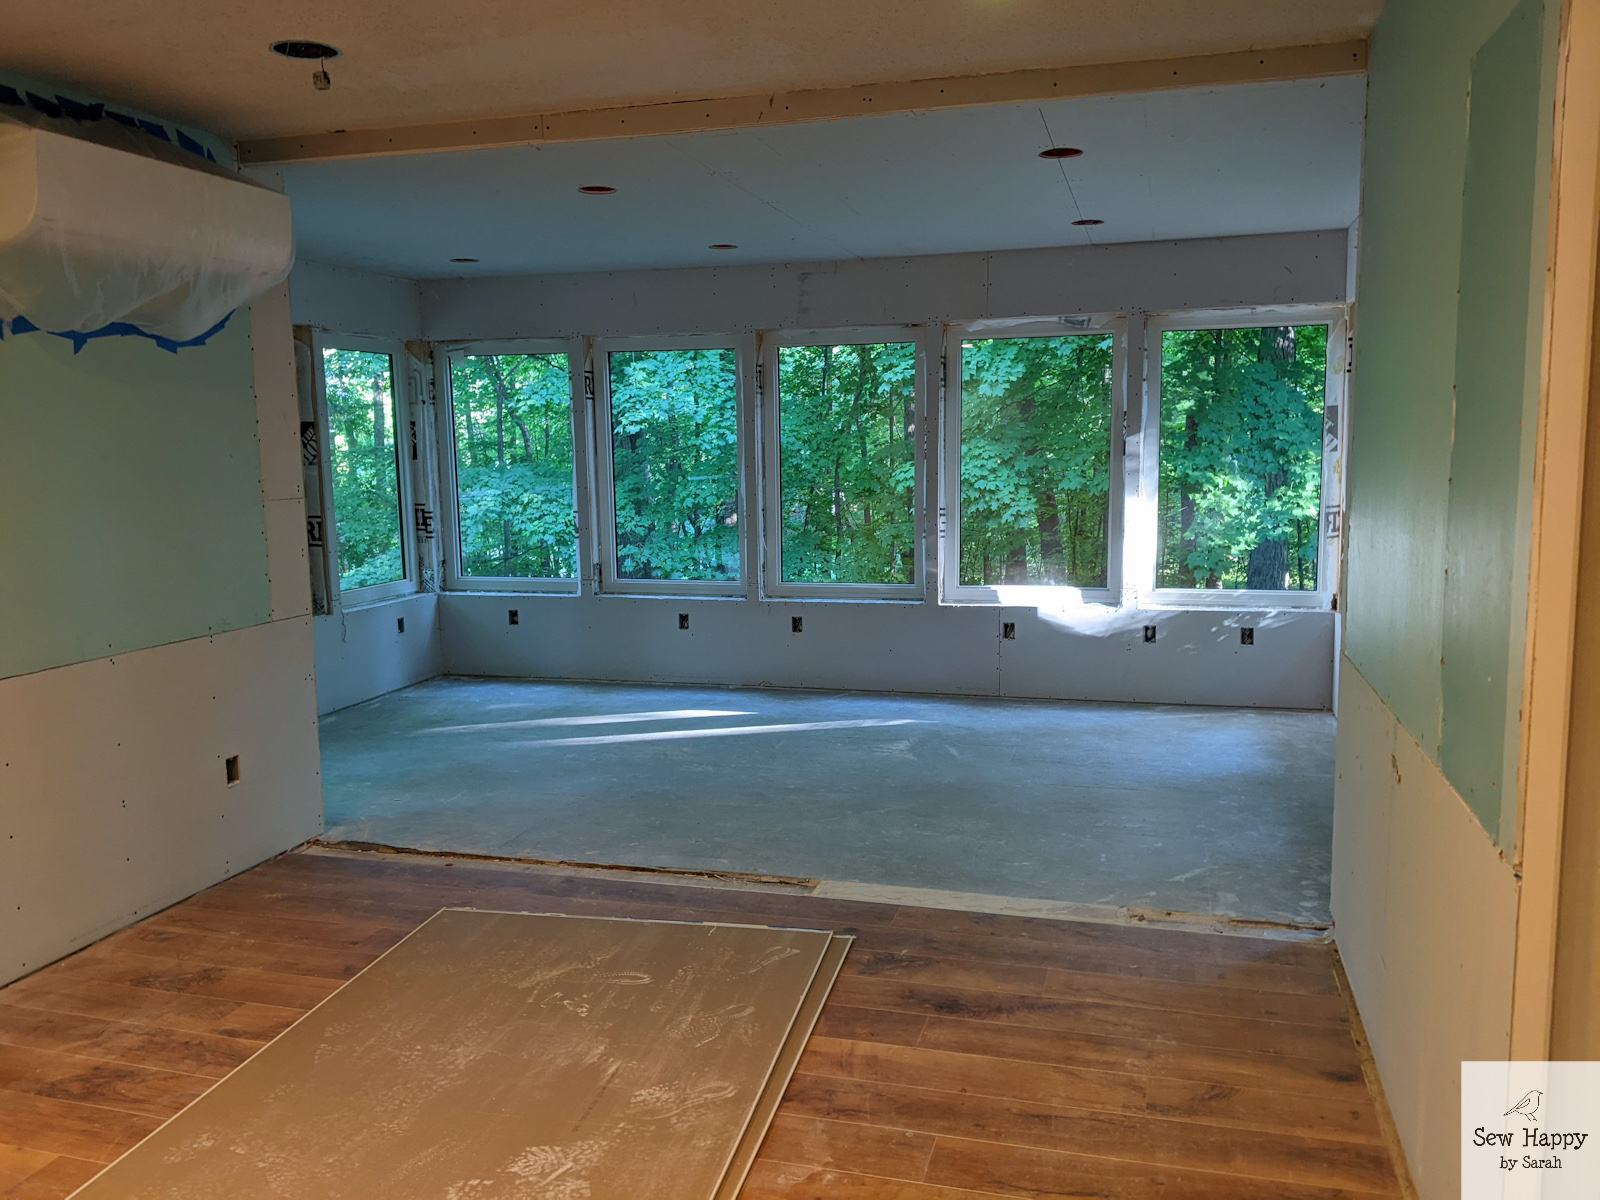
August 2022
Drywall is installedDrywall is patched and ceiling is texturizedCeiling is painted and walls are primedSiding is installed to match the rest of the house
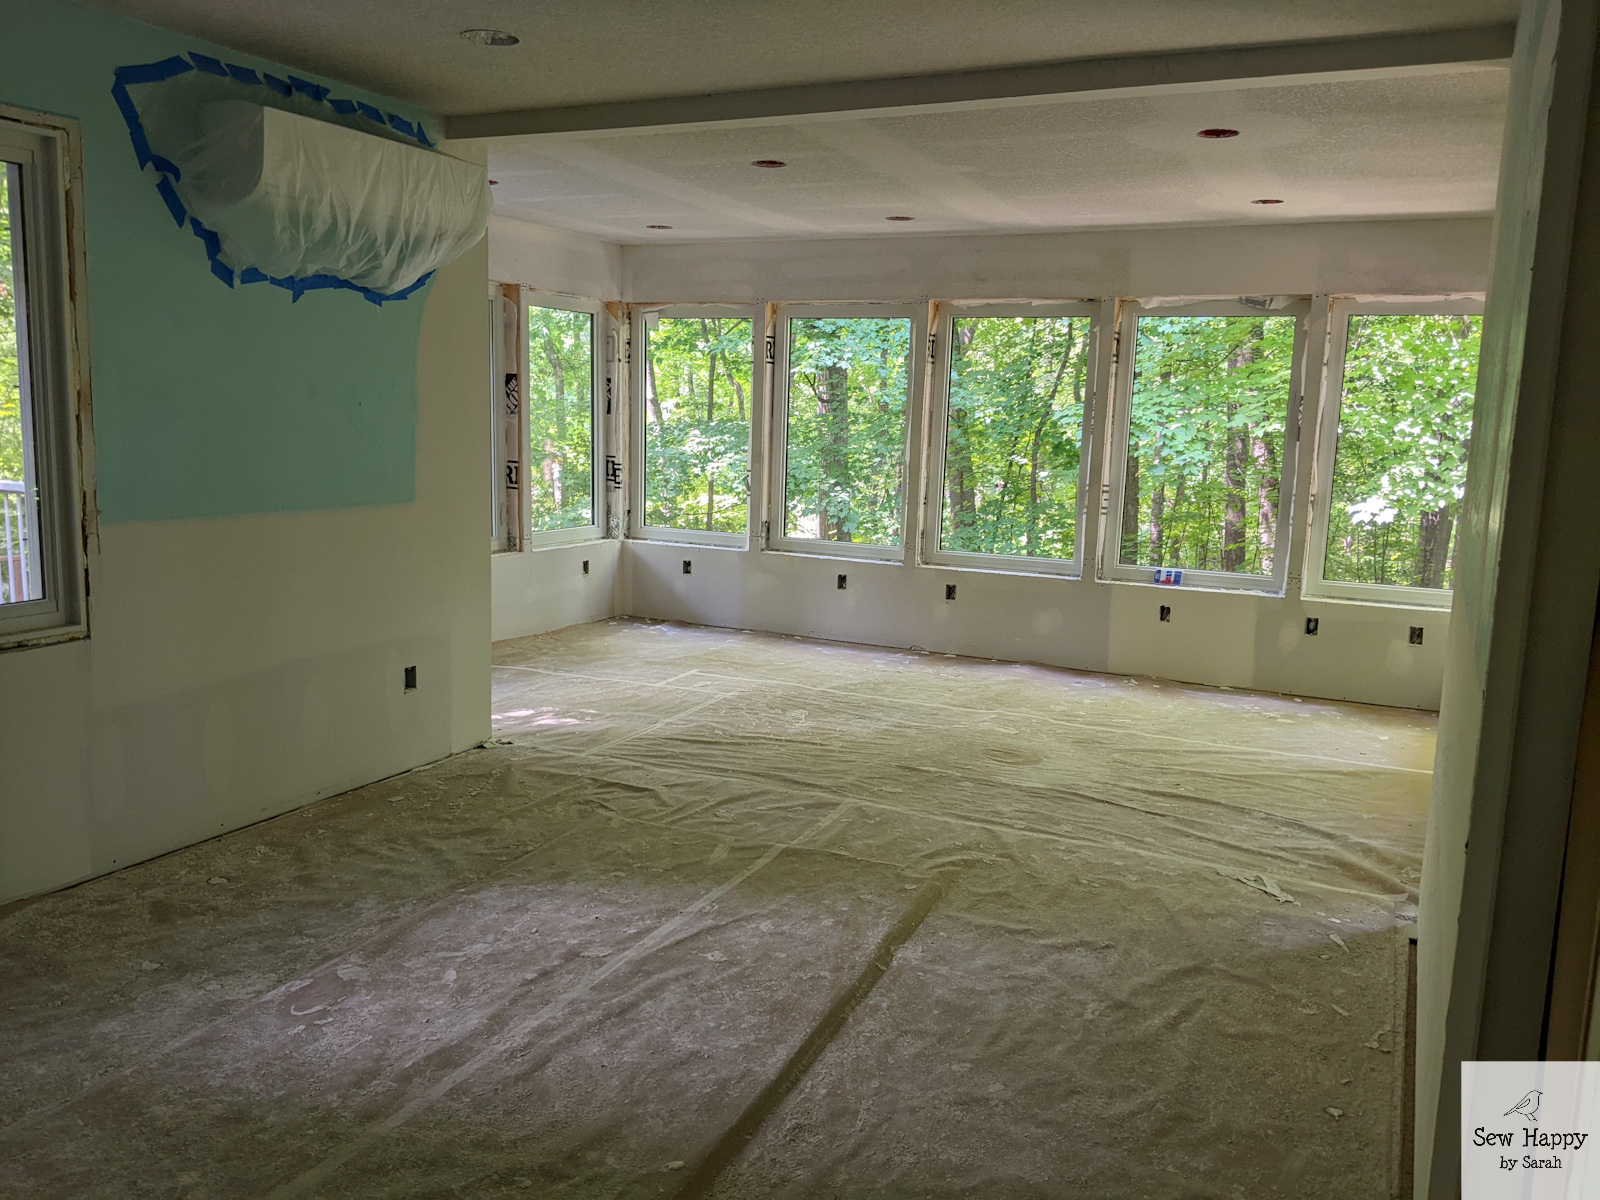
September 2022
Flooring and trim are installed
So there you have it! This is where we’re at today! Next up is paint (white for trim and Sherwin Williams “SW 6764 – Swimming” for the walls), finishing the electrical installation, finishing the siding and painting the siding.
I recently attended a local quilt show & conference and spent two glorious days viewing amazing quilts, shopping vendor booths, and taking classes. I learned so much and was so inspired!
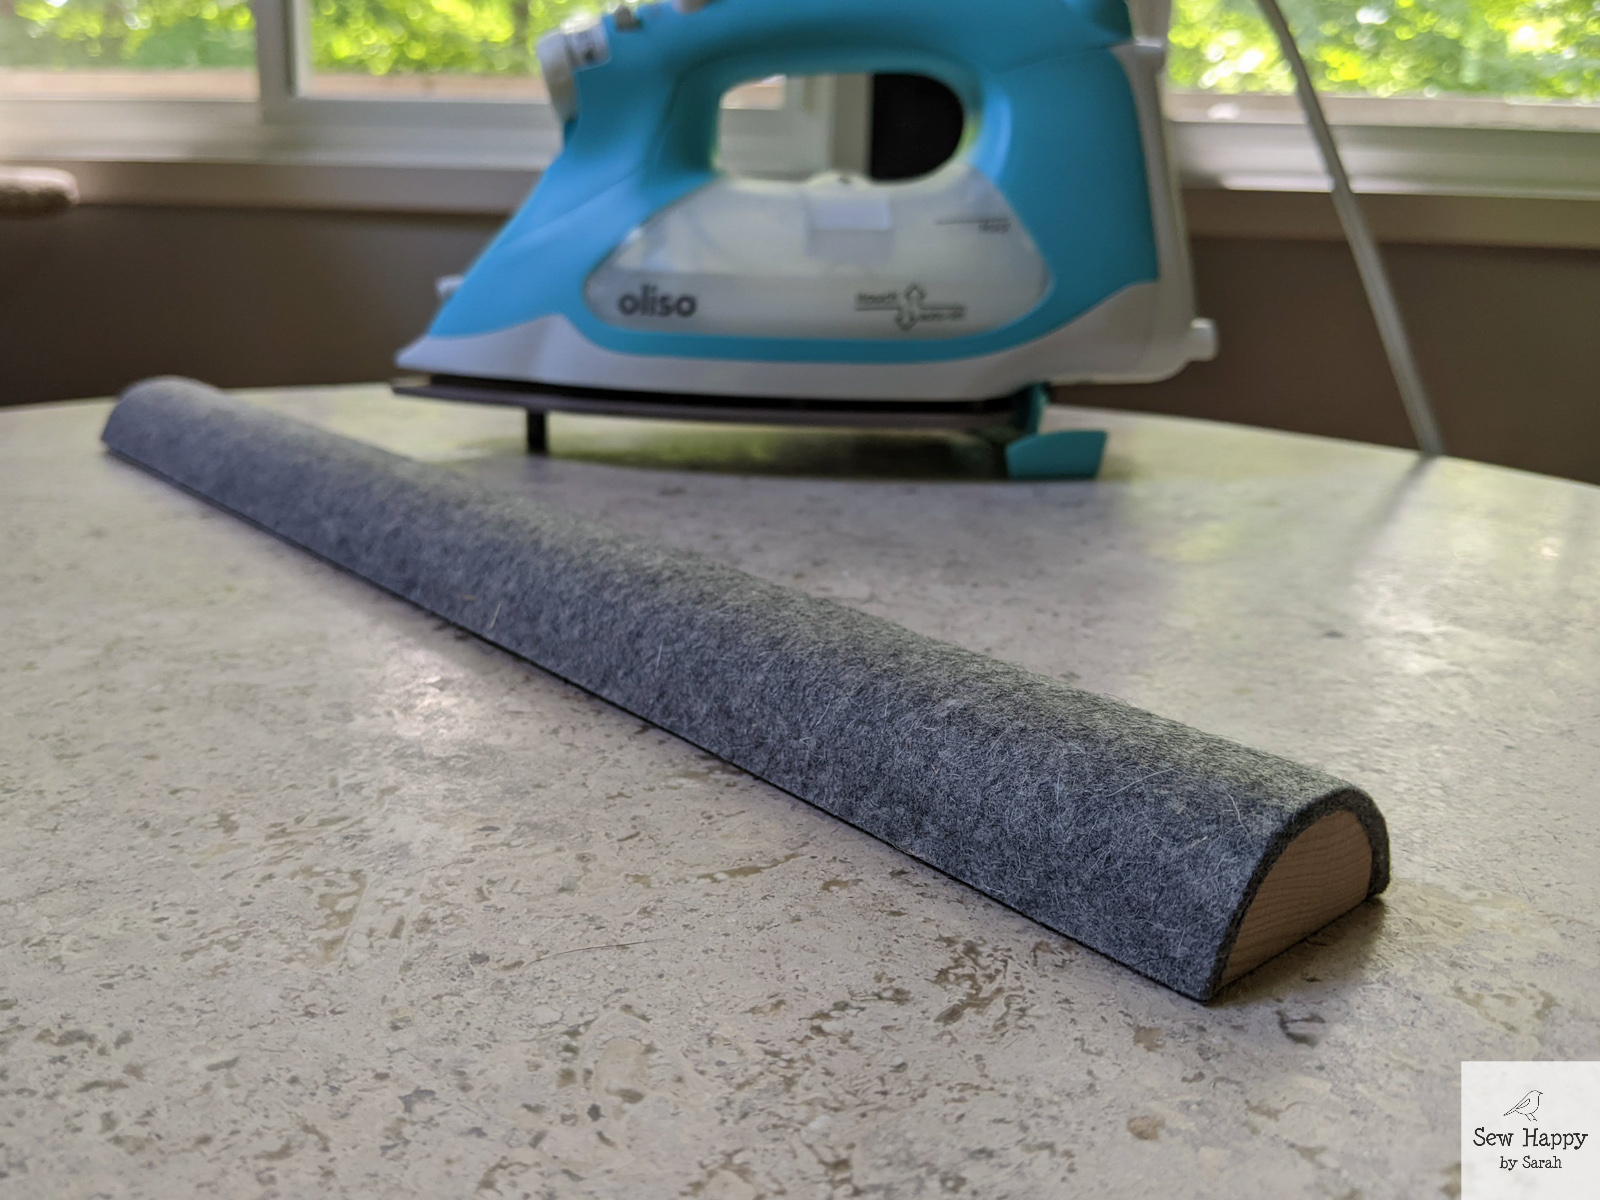
In one of my classes, the instructor brought out a pressing bar for us to use when pressing the seams open of the quilt we were making. I had vaguely heard of these before, but hadn’t seen one in person. Pressing seams open has always been a very awkward process to me, as I would try to push the iron to open the seam and use my fingers (close to the iron!) to help open it up and inadvertently press other nearby seams that got in the way in the wrong direction. It would be a battle to repress seams and keep the open seams open!
When I tried out the pressing bar I was amazed! The seam easily opened and I could do it one-handed! Following that, I purchased the Seams-Flat Pressing Bar by Maywood Studio from Fat Quarter Shop. It is a 17.75″ curved wooden core bar with 100% wool on top.
To use it, you simply place the quilt block on the bar, wrong side up. You then press the iron in the middle of the seam and glide it to the end, opening it up as you go. Because the seam is resting on this curved surface, it more naturally opens up and the other seams are not in the way. It’s quick and it works wonderfully with no extra fiddling!
I was using it today on my latest project: a Dear Jane quilt. This quilt has 225 different quilt blocks and since the majority are only 4.5 inches finished, pressing seams open becomes necessary! I’m going to get a lot of use out of this pressing bar.
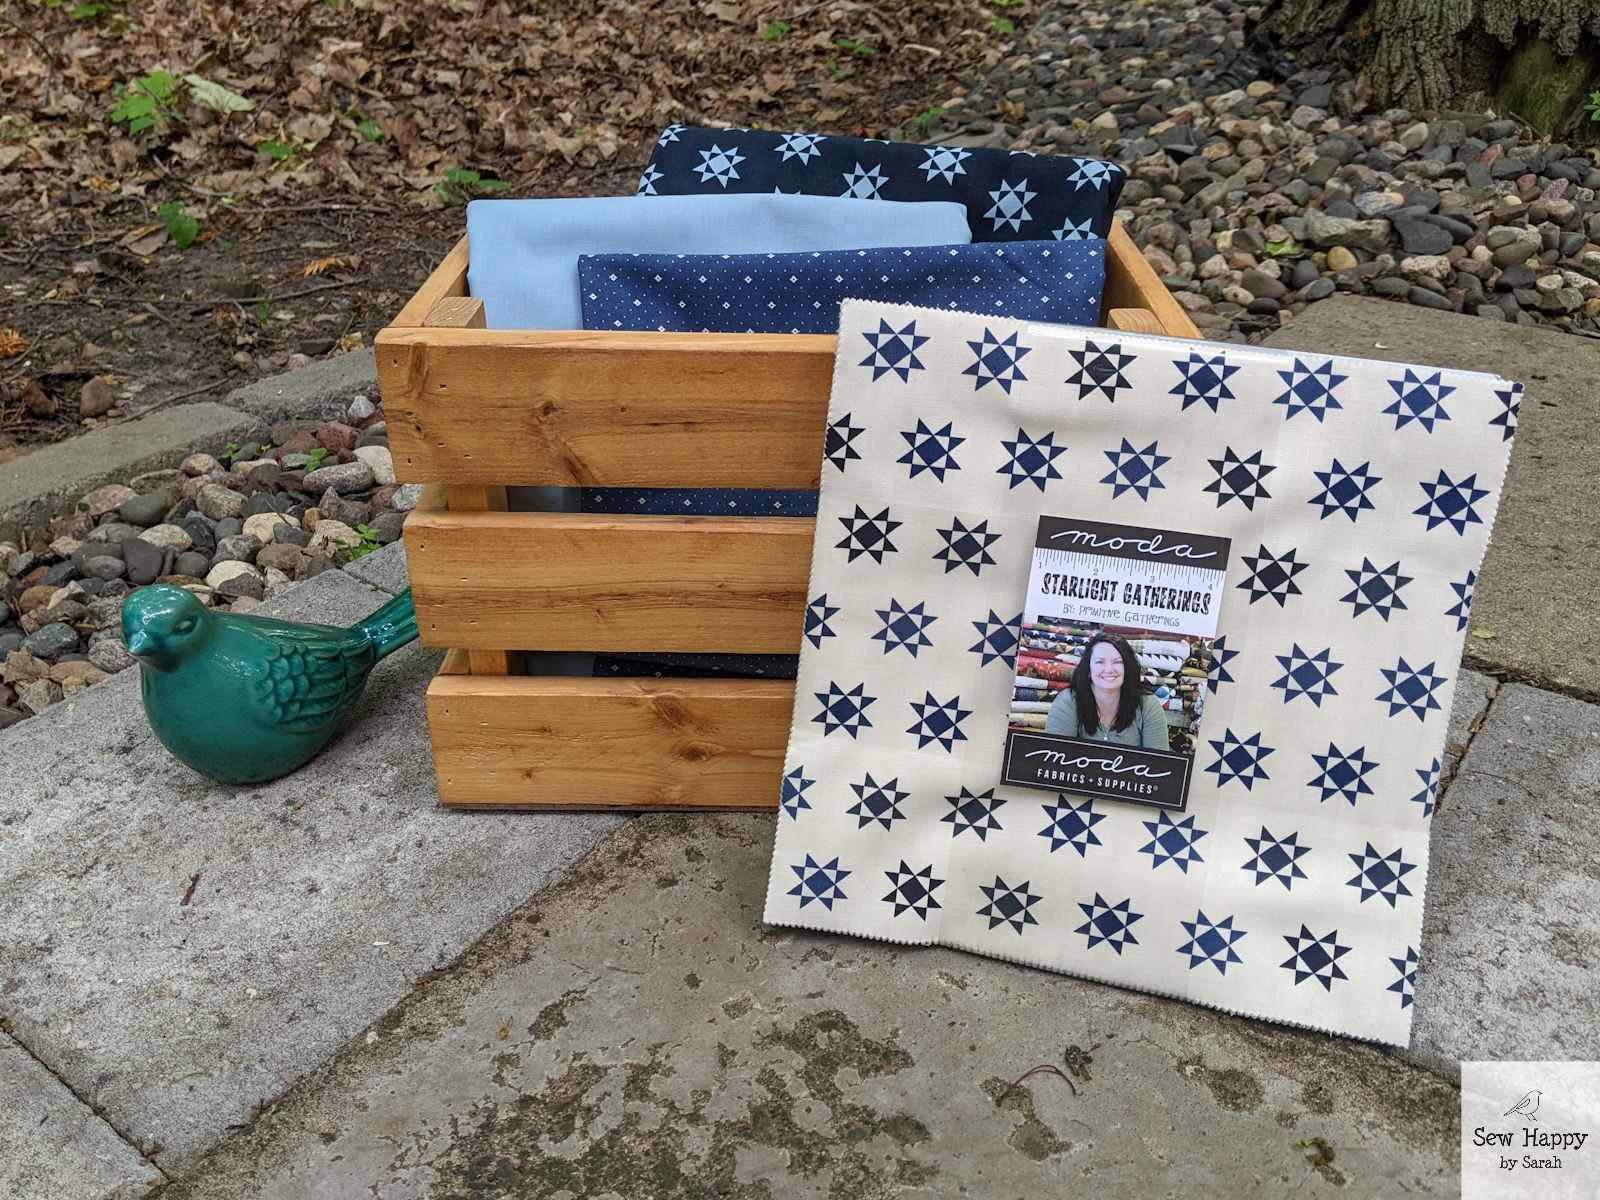
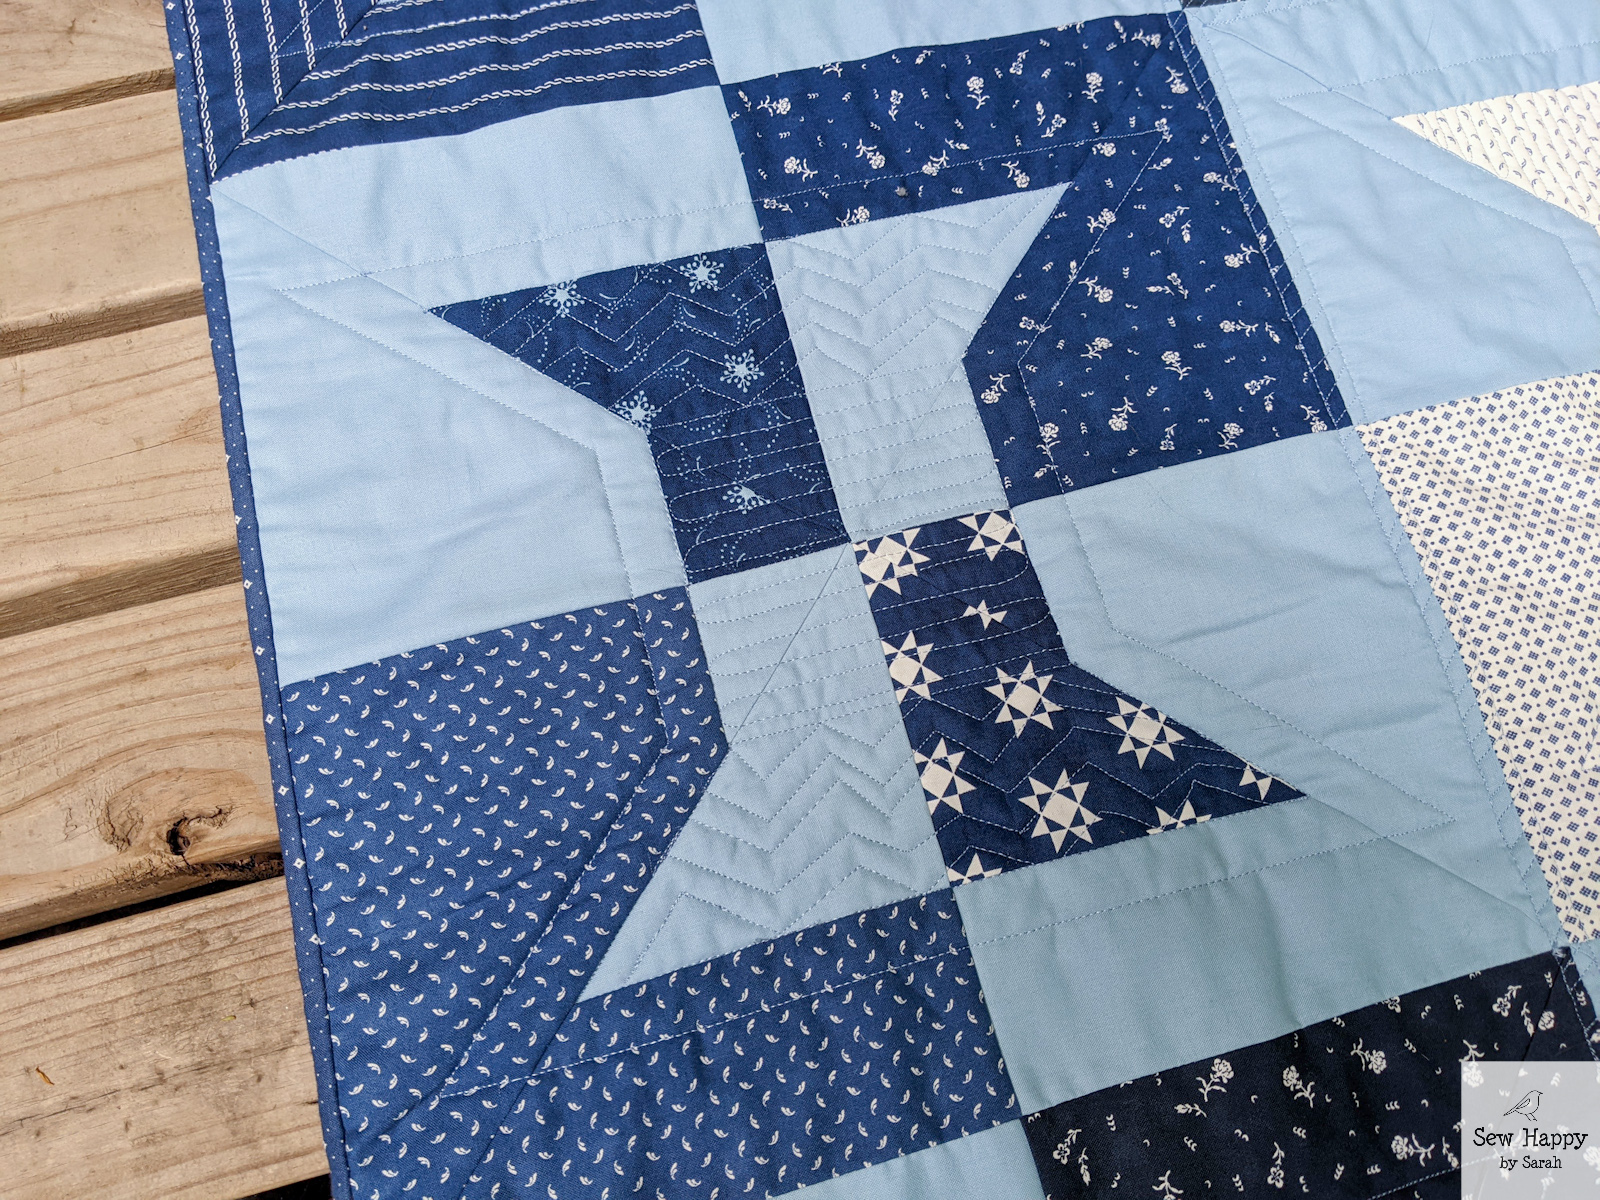
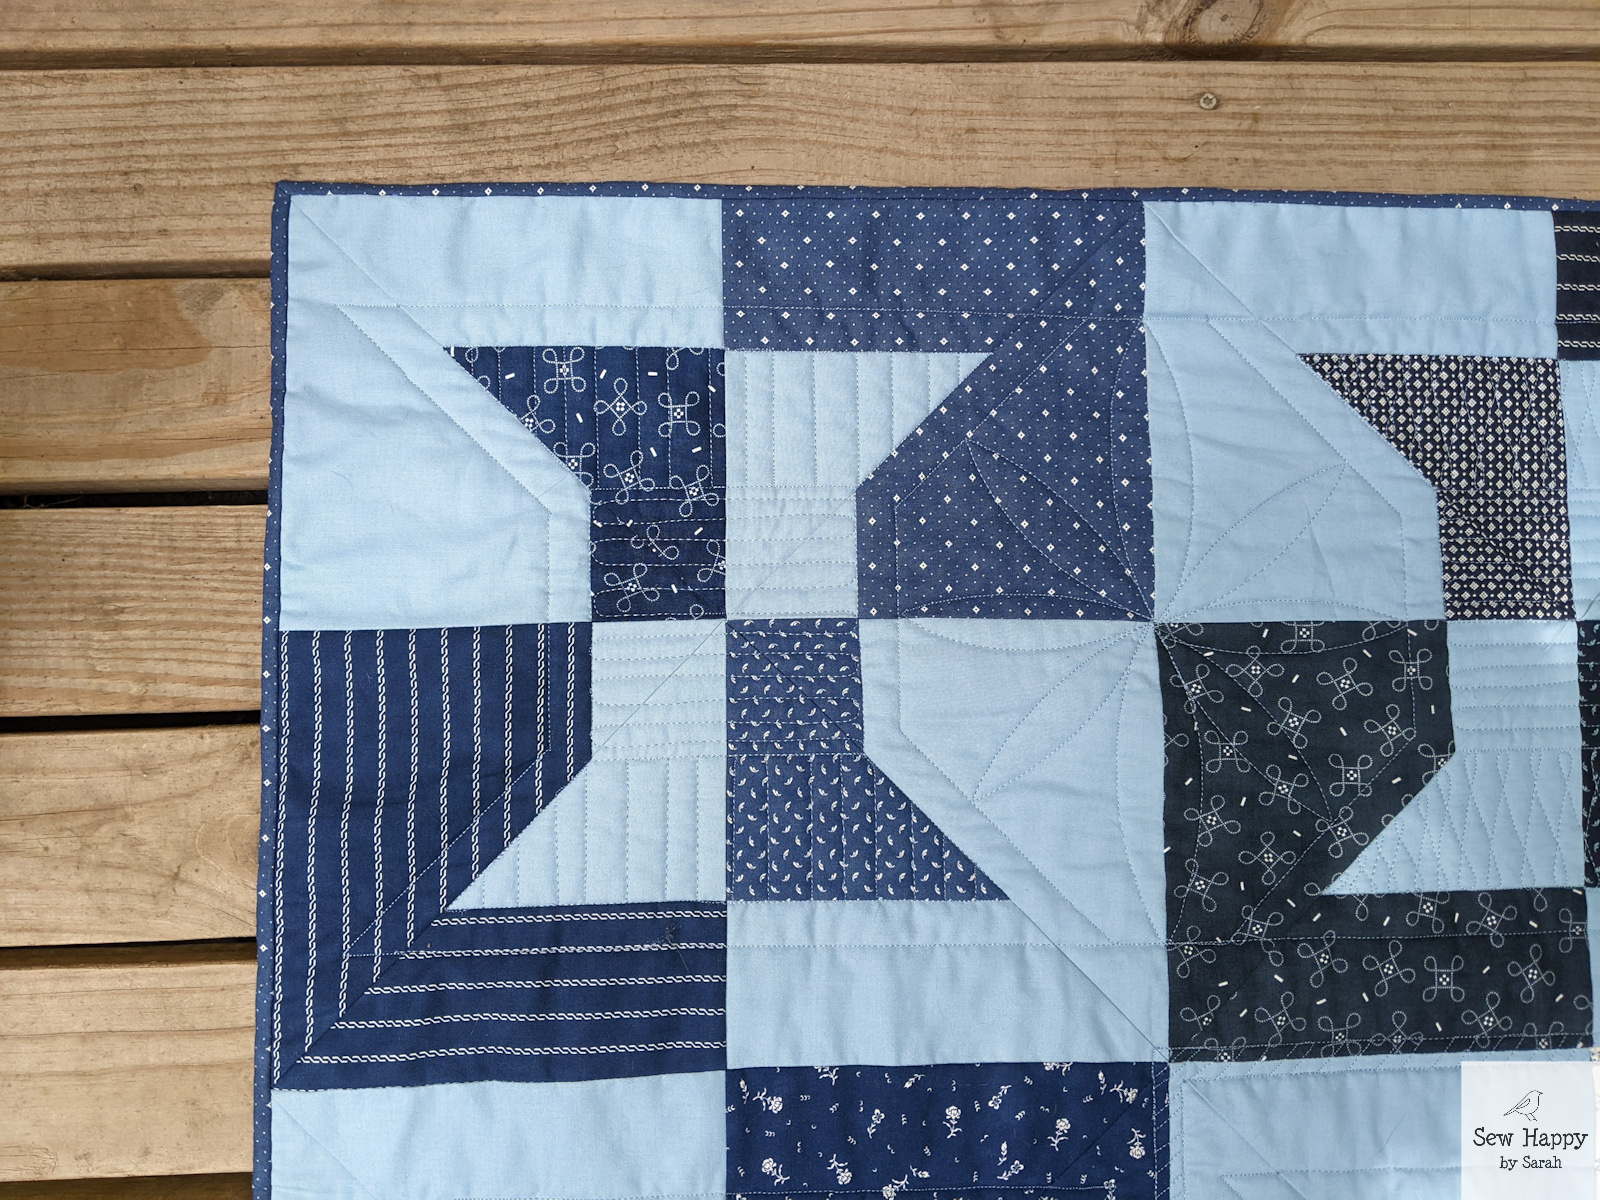
When Fat Quarter Shop invited me to sew along for their new Layer Cake Spools pattern, I jumped at the chance! I love anything sewing-themed and the unique design of these spools really caught my eye. This pattern is part of their Shortcut Quilts series which is designed to be beginner-friendly and fast by using precut fabric. The patterns provide multiple sizes and best yet, they are free!
The spools quilt uses two layer cakes (10″ squares): one for the main prints and one for background. I grabbed the Starlight Gatherings Layer Cake which is my current favorite new fabric line featuring a range of pretty blues with tiny diamonds, stars, and florals. I stepped out of the “white background” box by picking up some yardage of a coordinating light blue color Bella Solids Glacier for the background.
When I looked over the pattern, I was so impressed with the construction of the spools. The main and background fabric are pieced together in an ingenious way to produce the mirrored effect. The pattern recommended using an 8.5″ square ruler to trim the blocks down to size. Since I wanted to embrace the quick nature of this pattern, I bought the Quilter’s Select 8.5″ Square Ruler (my favorite ruler brand) and was so glad I did! Being able to lay the ruler down on the oversized blocks and simply trim around them made it so fast.
The pattern instructions are very easy to follow, but to make it even easier Fat Quarter Shop posted a great step-by-step video tutorial on their YouTube channel: Layer Cake Spools Tutorial. They are also offering a fabric kit if you’d like to make this in the fabrics they show in the pattern: Layer Cake Spools Quilt Kit. You can find more free Shortcut Quilt pdf patterns at Fat Quarter Shop Shortcut Quilts.
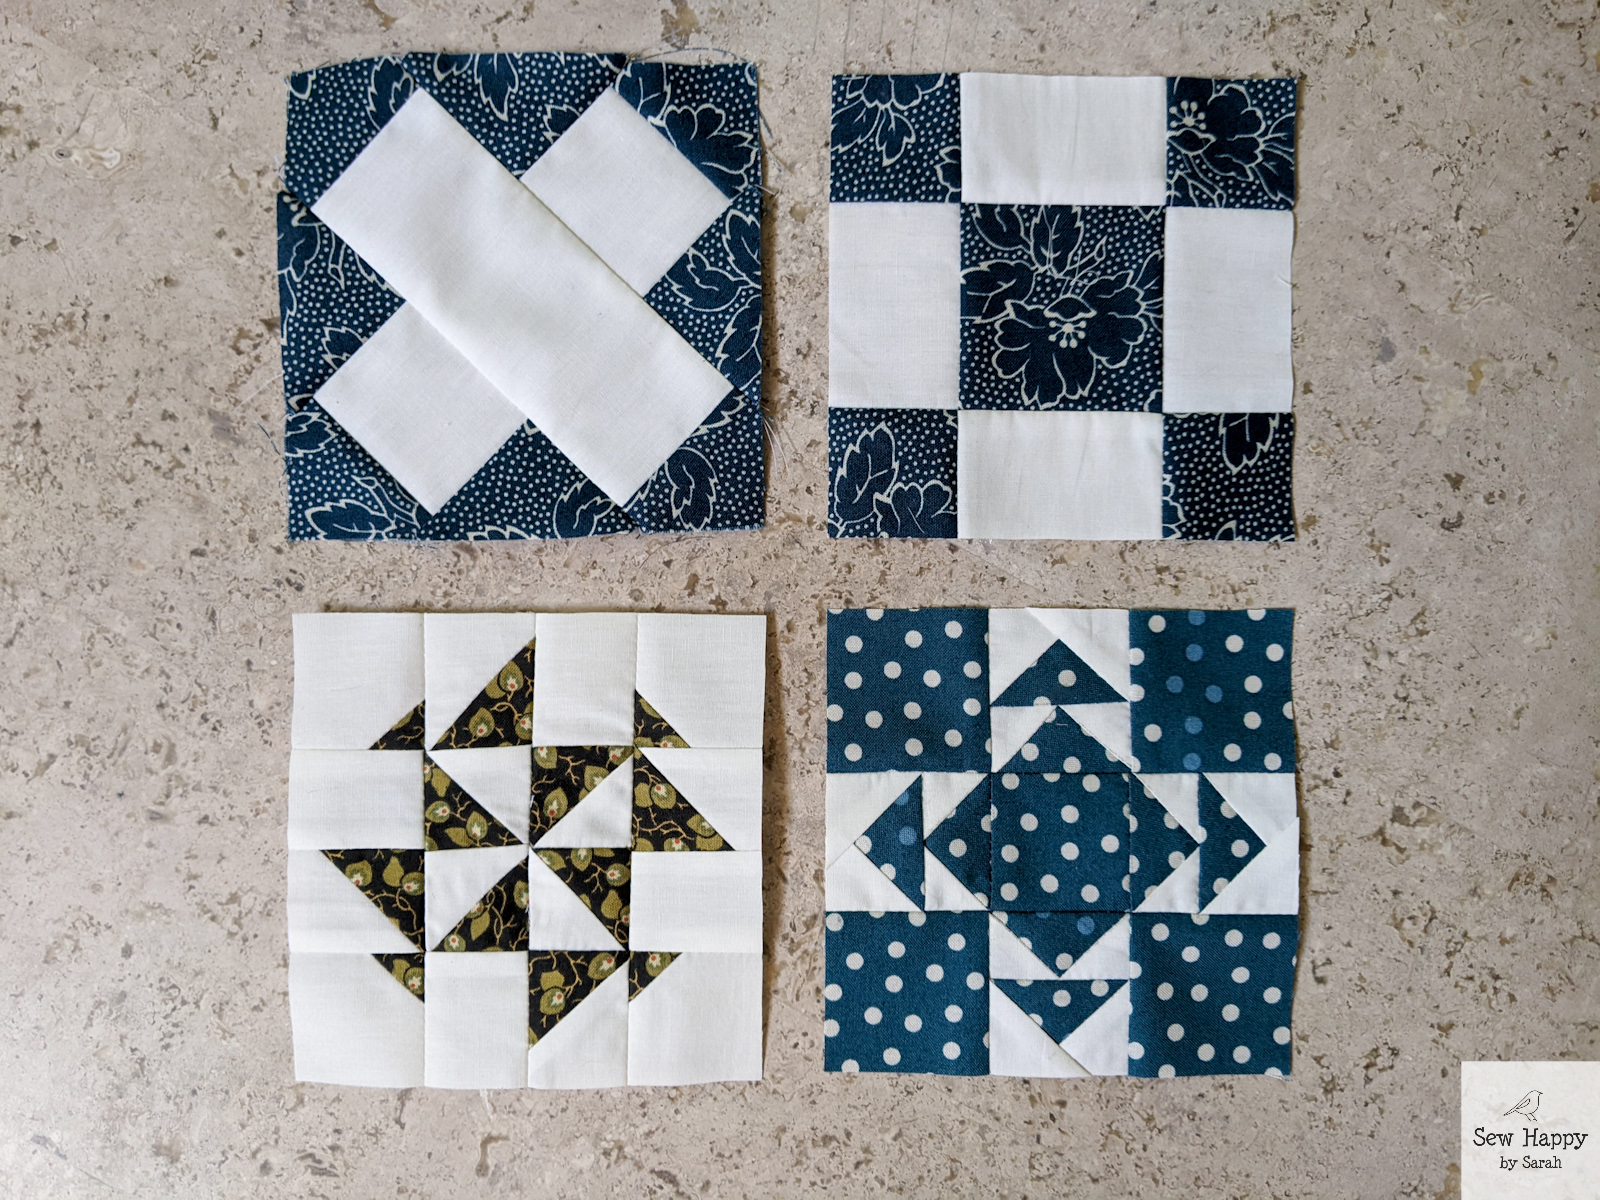
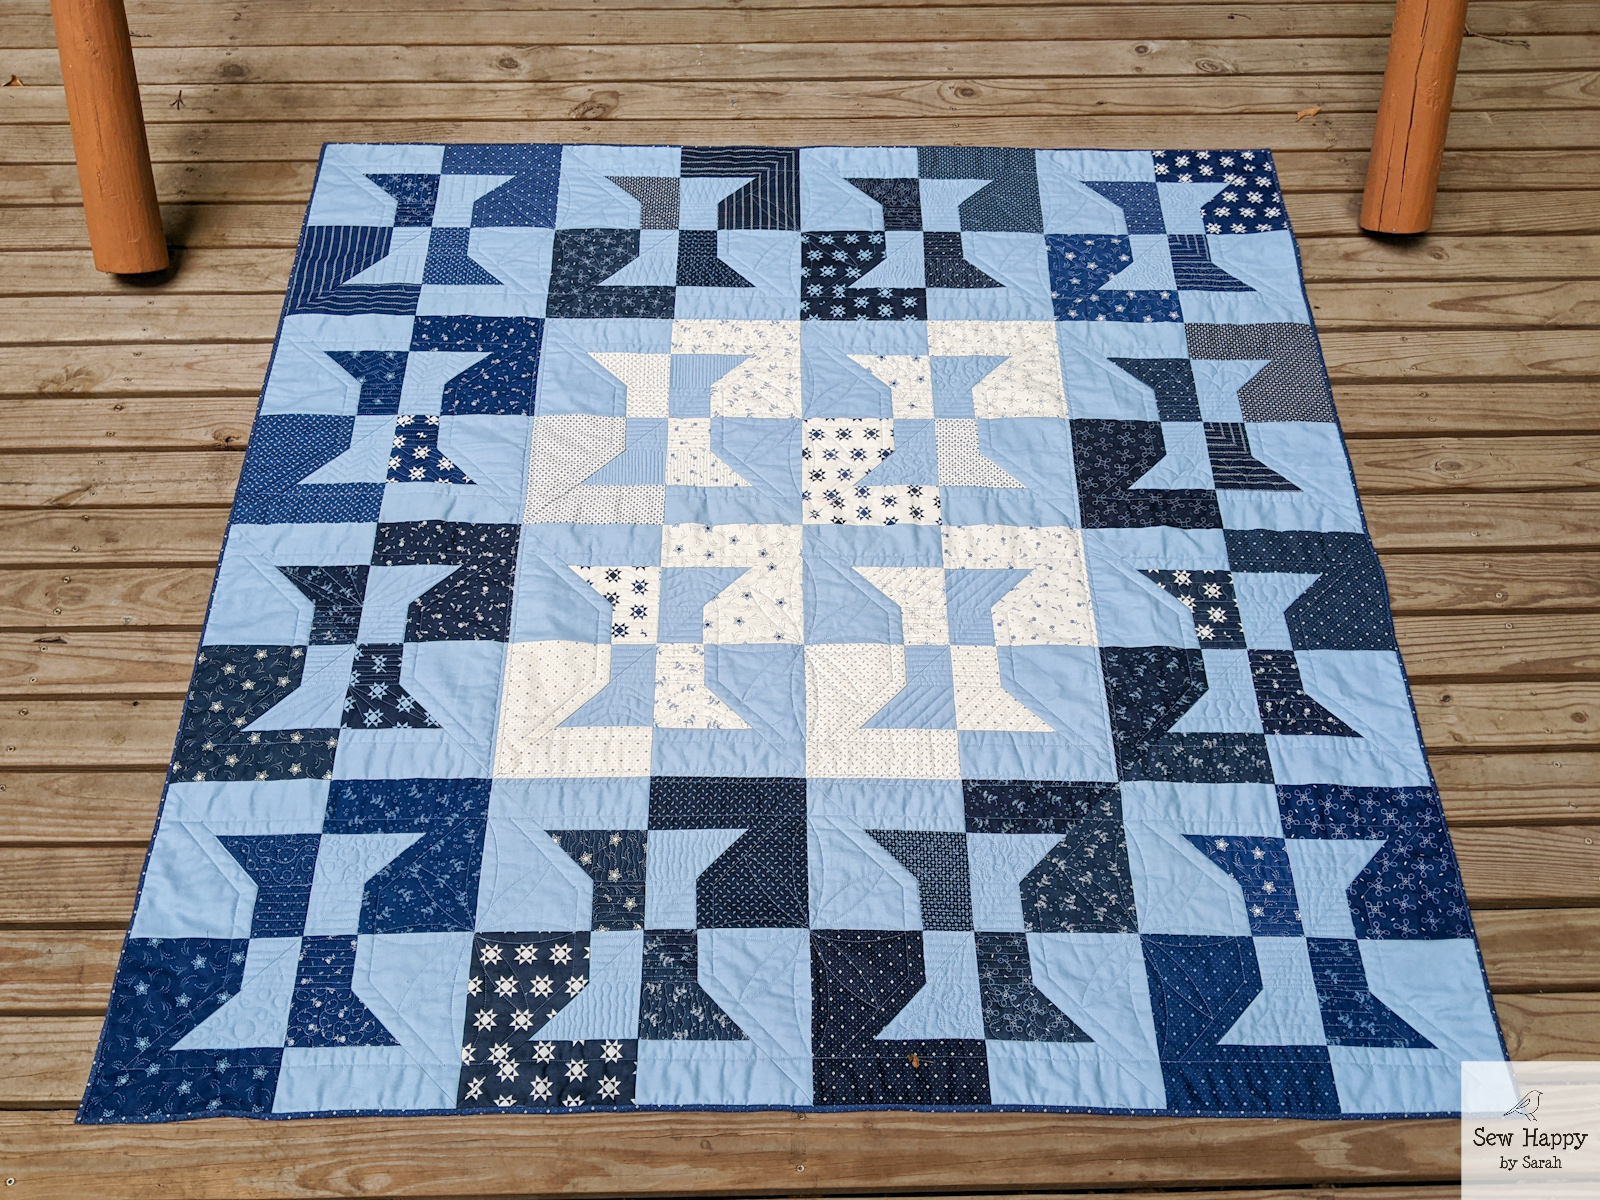
The majority of my layer cake was blue prints, but there were some white prints as well. I decided to separate the colors and make sets of blue spools and white ones. When it came to assembling the blocks into the quilt, I tried out many different layouts and in the end put the white blocks in the center. I like how the blue spools create a nice frame around them!
As I always try to do, I took the opportunity to play around with many quilting designs. I used a back-and-forth line to represent the thread, but chose a different design for the spool caps of each spool. I tried out different orientations of straight lines, spirals, waves, and loop-de-loops, make each spool unique! I thought something more was needed between the spools, so I added a flower design.
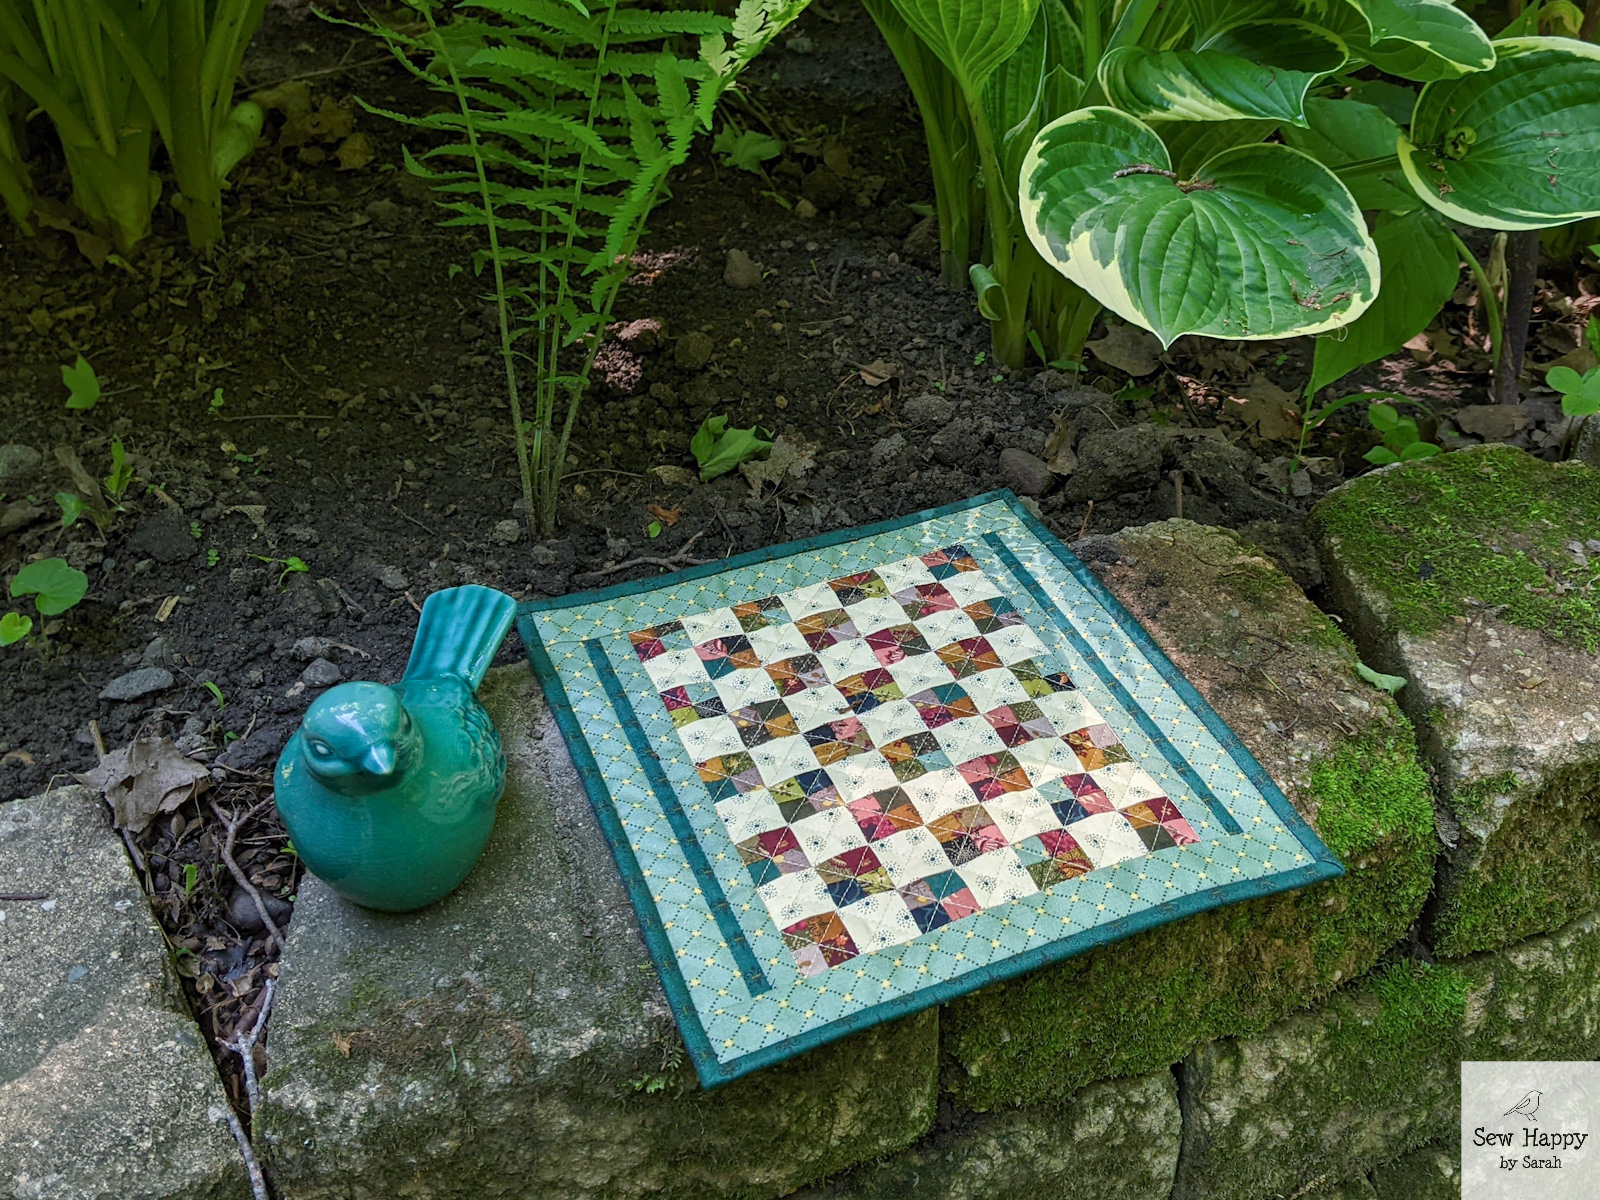
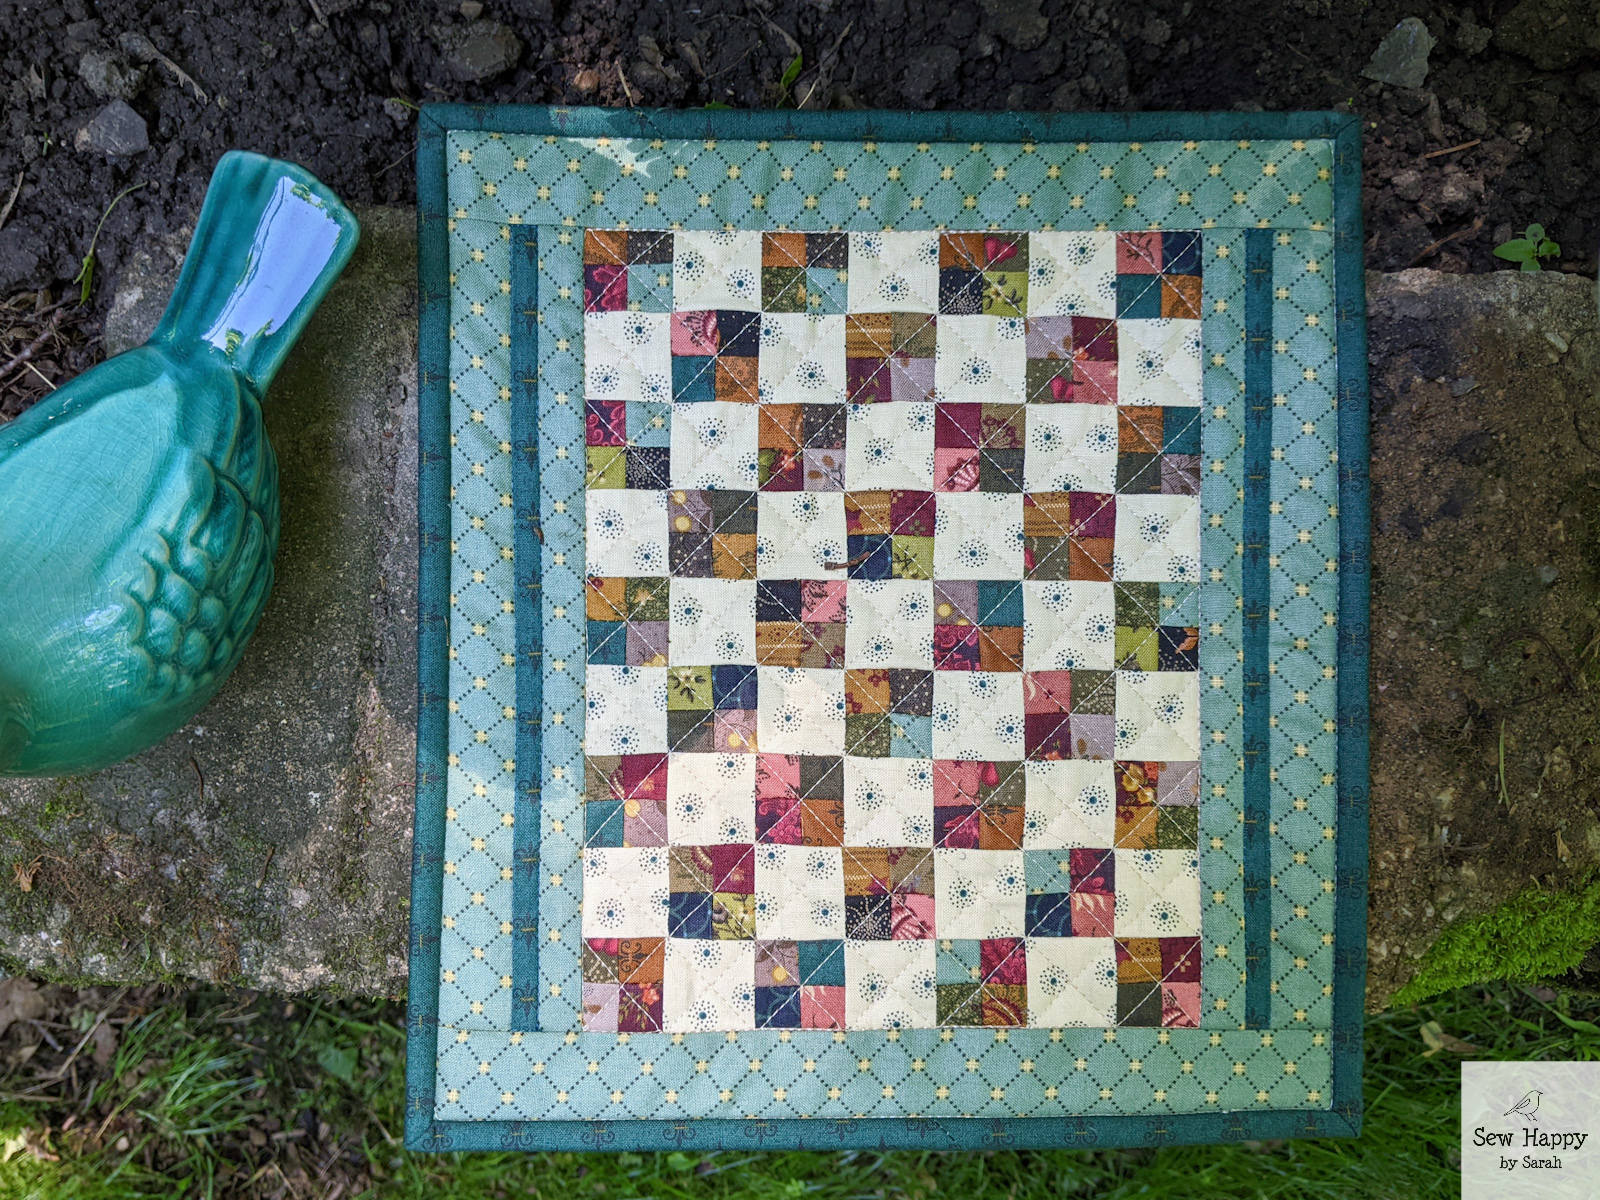
I think I’ll use this little mini from Simple Whatnots Club 11 as decor on a small table or hang it on the wall of my sewing studio as a little work of art!
This mini quilt is only 10.25″ x 11.25″ and the pieces are just as mini: each square in the colorful 4-patches is 0.5″ finished! Whew! Luckily I didn’t have to sew together each tiny square. I used the amazing Creative Grids Turbo 4-Patch Ruler! You sew strip units together and cut the strips into pieces following the guides on the ruler for the finished unit you want to create. Then you assemble two of those pieces together to create a perfectly accurate 4-patch. It was so fun, I’m trying to figure out what else I can add 4-patches to!
Creative Grids Turbo 4-Patch Ruler
I kept the quilting simple so these little squares could be the star of the show. I used a walking foot on my domestic machine to create the diagonal lines. Conveniently the layout of the squares lended themselves well to this and I was able to follow the corners of the blocks to precisely create my lines.