
Tag: short-sleeved

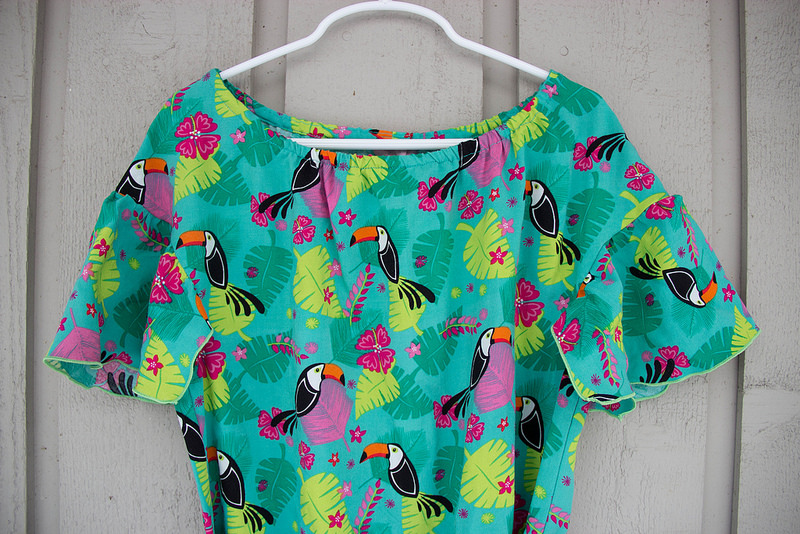

Ottobre – 3-2016 #25 “Paperplane” jersey dress – Version 3


Size 122 with 128 length
Ottobre – 3-2016 #25 “Paperplane” jersey dress – Version 2


Size 122 with 128 length
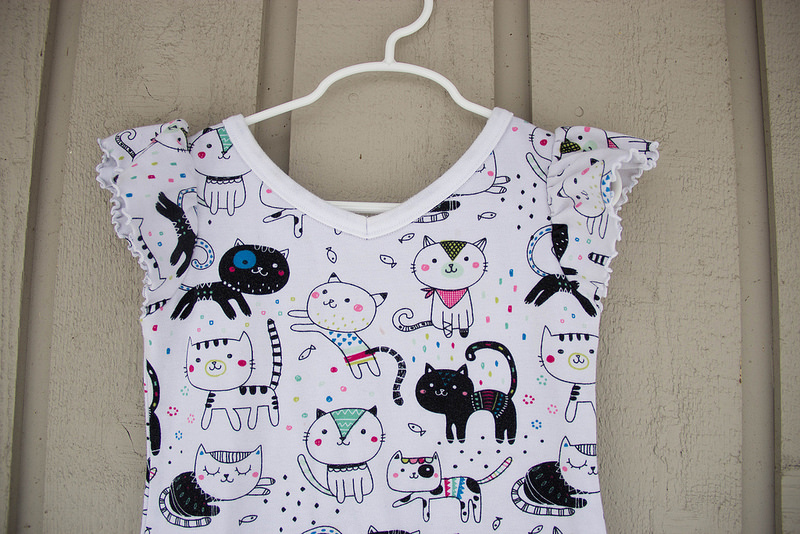
Ottobre – 2011-03#19 “Young Designers” T-shirts
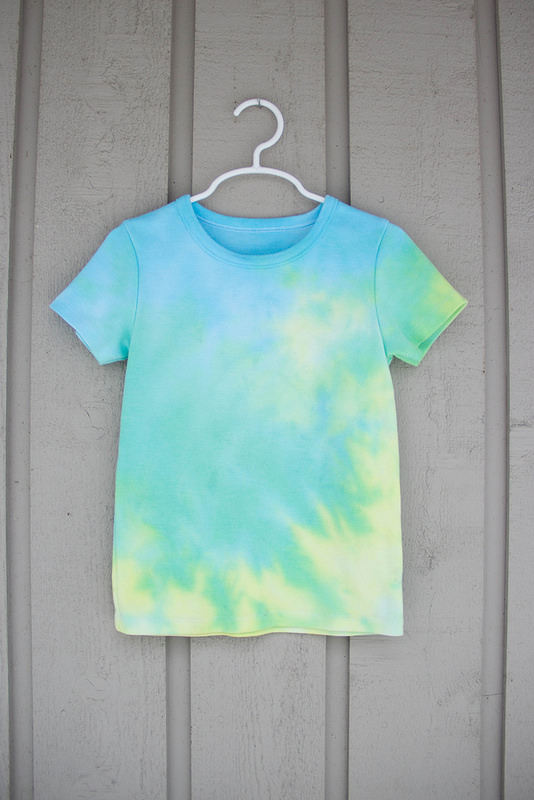 Size 110 with 134 length
Ottobre – 3-2015 #15 Lionella Jersey Dress
Things I Learned
- Sleeves – It took me awhile to figure out what the instructions for the sleeves were describing. From what I read I thought it was going to have some exposed seams which I didn’t think was correct! Finally I pinned the pieces to replicate where I thought they would be sewn and understood what I needed to do. Sometimes it’s just easier to play around with it than try to imagine the next steps! Unfortunately the length of elastic tape I used was too small for my daughter’s arms — the sleeves were a little too tight. Next time I will measure her arms first to confirm the elastic length!
- Back strap – I was worried about how the strap across the back would turn out and I was actually pleased with the result. I was afraid it wouldn’t be tight enough and would hang loose, but it was nice and tight.
- Ruffles – Attaching the bottom ruffle to the bottom of the skirt panel went fine, but I had a big battle with the upper ruffle. I’m still not sure if it was due to a mistake on my part, the type of fabric I used, or what… For some reason my skirt panel was about 7 inches bigger than the top ruffle and I’m pretty sure stretching the ruffle wasn’t going to make up enough of that difference. I ended up having to gather the top of the skirt panel. It worked out ok, can’t be seen from the outside of the dress, but I know it isn’t perfect. 😦
- Bodice size and length of dress – The bodice ended up being too small for my daughter even though the 110 size was actually supposed to be a little big for her. You can see in the pictures the bodice is pulling in strange areas. The length of the dress is too short too.
I ended up giving this dress to a friend’s daughter who normally wears a size 3T… The bodice is a little roomy for her, but actually looked ok loose-fitting like that. The length was perfect for her. I’m still not sure if I made a mistake somewhere or this size was not right for my daughter. If I try this dress again I’d probably go up a size or do some custom pattern changes to the bodice. Perhaps make it longer and wider.
I really wanted this dress to work! It’s such a cute design.
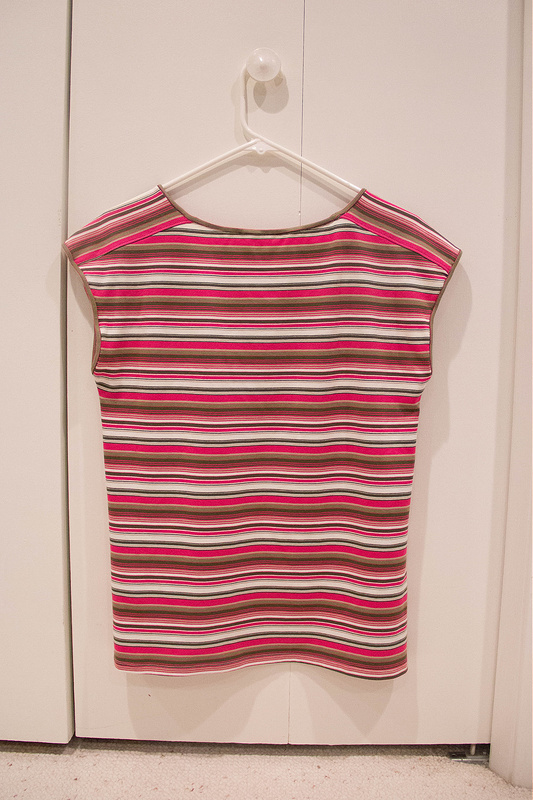
Ottobre – 2-2015 #17 Faded Stripes Jersey Top

Things I Learned
- Easy! – Nice, easy sew!
- Stripes – Carefully line up stripes when cutting out front and back shirt pieces! After I was finished with the shirt I realized it would have been nice to have the stripes lined up perfectly from front to back.
- Binding – Use a solid color for binding! For this shirt I used the same fabric as the shirt and it coincidentally looks like a solid color but it just happened to work out that the binding is the width of one stripe… After it ended up like this for the neck and I had to make it look the same for the sleeves.
- Fabric type – After the initial wash of this shirt I was worried I wouldn’t be able to wear it. The fabric was super static-y and I couldn’t stand it! Luckily I haven’t had a problem since. I believe the fabric is more of a polyester blend, where I’m used to 100% cotton. It also has started to pill after 2 months of washes. 😦
Even with the imperfect stripes I have been wearing this in public and have gotten a lot of use out of it. 🙂 I love the style! Something a little more interesting than a plain t-shirt, but comfortable too. I will definitely be making this again.
Ottobre – 2-2014 #3 Solid Green Jersey Top


Things I Learned
- Gathered neckline – I feel like my gathers ended up a little off-centered. Next time I will make the elastic tape a little longer and start it a little before and end it after the markings on the pattern. With elastic tape, the start and end of my gathers is never as good as the middle.
- Fabric type – This was made from a cotton blend knit from JoAnn’s. I didn’t really like the feeling of the fabric and after some washes it started pilling. 😦 I will try this shirt again with some more expensive fabric!
This was the first piece of clothing I made for myself. 🙂 It was a good fit on me so I was very pleased! It’s worth another shot to get the neckline perfected.
Ottobre – 6-2013 #21 Cap Sleeve Pinafore Dress


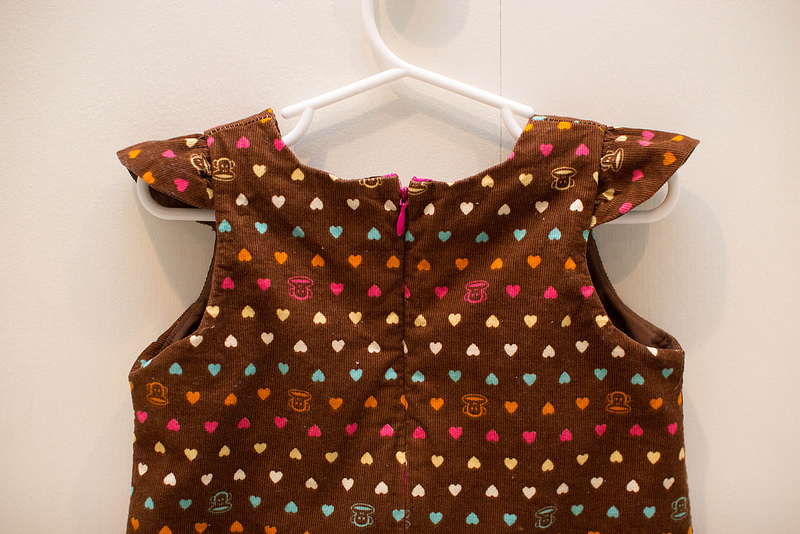
Things I Learned
- Cutting out fabric – I was just so excited to be starting this project that I didn’t realize how the pieces were going to need to be lined up until I had already cut some of them out. Surprisingly I was able to line up the rows of hearts & monkeys pretty well, however, looking at it now I see how the rows look skewed. It’s possible that this type of fabric design wasn’t made for this type of dress. The front and back of the dress are made out of 4 different panels. Next time I might use some solid colors to play up the different panels.
- Lining – This was my first time lining a dress so I came across a couple terms I didn’t know of. Had to search for some online tutorials. I remember thinking “how in the world is this going to work out?”, but it did!
- Zipper – Oh, the invisible zipper… My first time doing this as well. I had to install it and take it out again a few times… It turned out ok, just a little wonky at the top. It was functional, though!
- Pockets – The faux pockets turned out cute! (Also easier than real pockets!)
I really think this is a sweet, classic design. I will definitely make this for my daughter again.
