Kim Diehl

Harvest Hill Quilt

You could say I’m a season behind… or I’m working way ahead! Here’s the latest quilt I finished: Harvest Hill by Kim Diehl. I started this one in September at a quilt retreat, finished putting it together during October and then had to wait some weeks before my longarm was re-assembled in my new sewing room before I could quilt it. Nevertheless, it’s going to be a cozy quilt for next Fall!

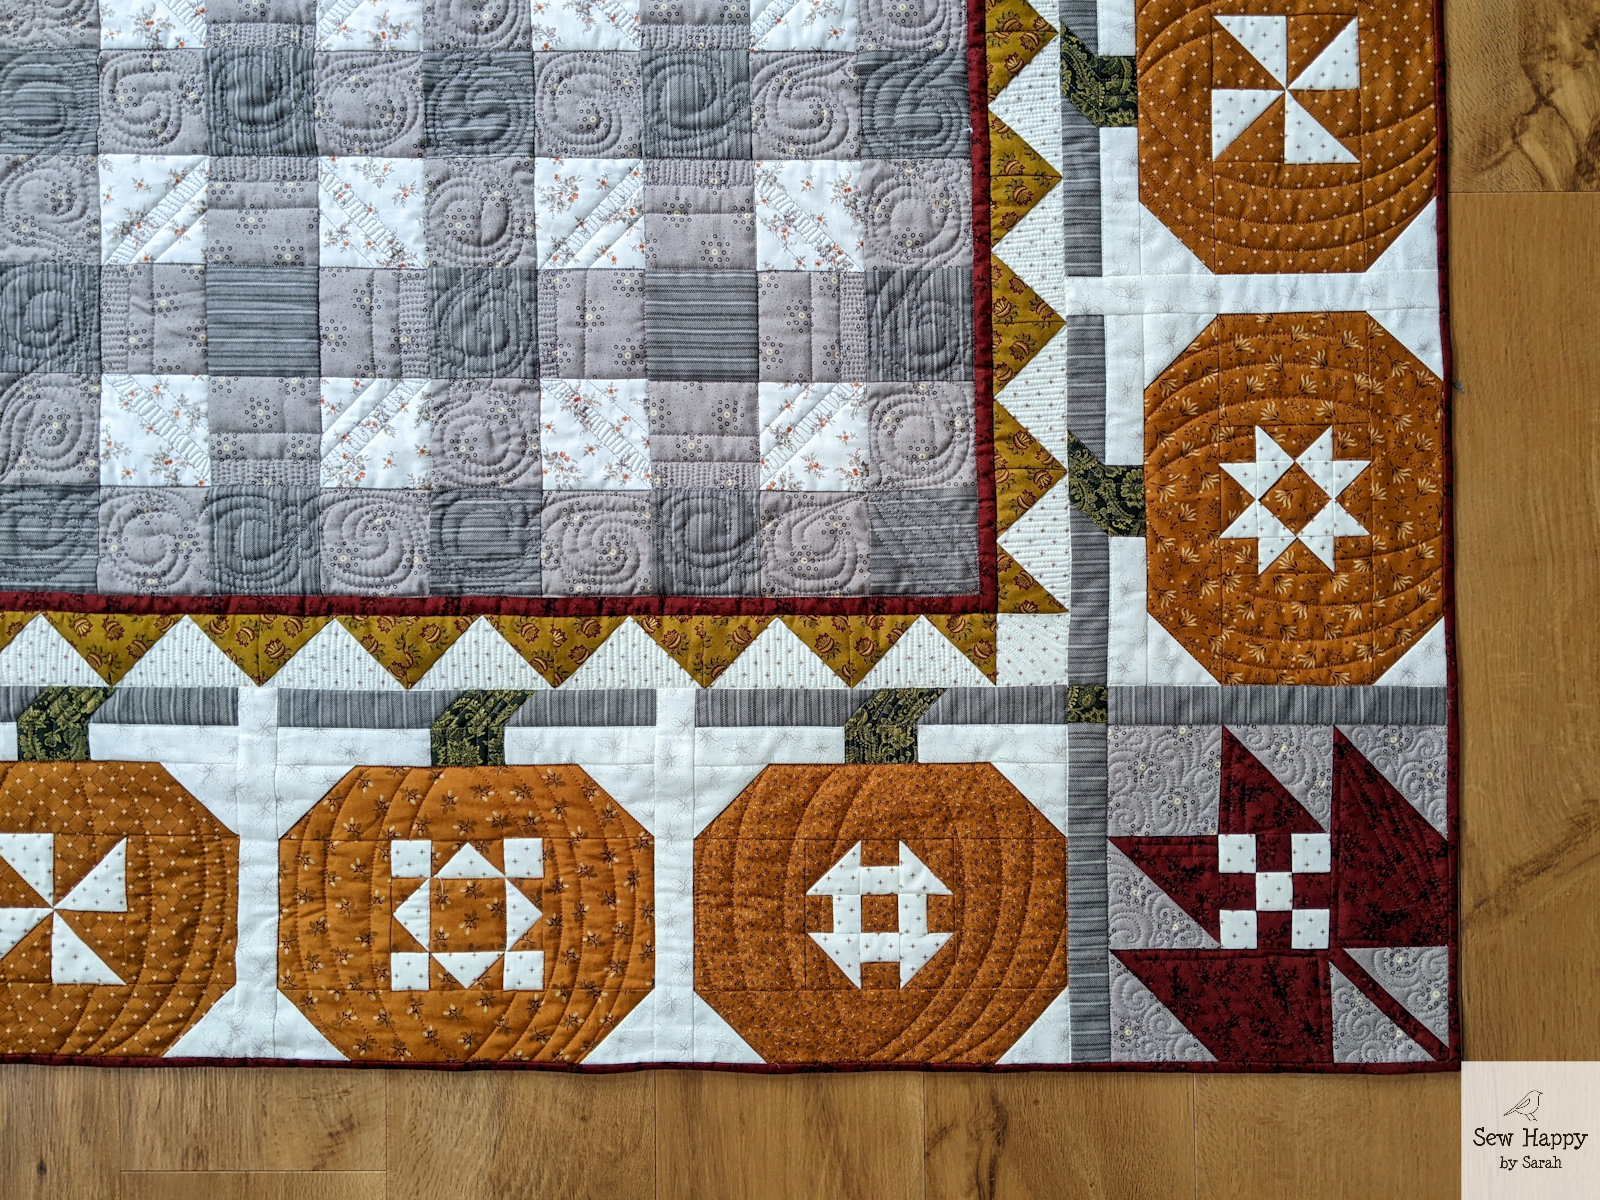
When I purchased this quilt kit, I was drawn to the pumpkins and the playful quilt blocks inside each one. So much so that I have plans to use some of the leftover fabric to make some coordinating pumpkin pillows for my couch! I’d say the most unique part of this quilt from any I’ve done before is the center. It’s not one piece of buffalo plaid fabric: I cut out all of those squares and pieced them together! It’s an interesting effect, but if I had it to do over I would have added some other blocks between the plaid. More pumpkins?

I was also challenged in how to quilt the middle! I decided I wanted to dress it up a bit and added some swirls and geometric shapes that mimicked the pumpkins. It definitely took a lot of time. The pumpkins, on the other hand, went by quick once I thought up the curved line idea. I love how it gives them dimension!

For the first time I used flannel for a quilt backing. I used Autumn Gatherings Flannel by Primitive Gatherings and I love it! I definitely will try it on another. There was no difference in how I had to quilt it and it will be even more soft and warm!

Finished Size: 64.5" x 64.5"
Pattern: Harvest Hill by Kim Diehl
Fabric: Harvest Hill by Kim Diehl for Henry Glass, Autumn Gatherings Flannel by Primitive Gatherings for Moda for the backing
Ottobre 5/2014

Ottobre – 5-2014 #5 New Boheme Jersey Tunic

This is technically version 2 of this shirt, but I’m only documenting this one. 🙂 I messed up on the neckline of the first shirt so this is my remake.

Things I Learned

  • Pockets – I needed extra help understanding the understitching of the pockets and thankfully found a tutorial for the kids’ Flycatcher tunic that describes the same process: How to sew understitching for pockets.
  • Neckline – I didn’t fully understand the instructions for the neckline facing.  I believe that I was supposed to turn the entire facing piece to the inside of the shirt, but I was worried it was going to make the neckline too wide for my tastes.  I’m so used to doing binding that I just stuck with that.  Unfortunately, either because of my fabric type or user error, the front of the neckline is a couple of small waves.  😦  This won’t prevent me from wearing it at home, but may prevent me wearing it out and about.  We’ll see.
  • Sleeves – I really like the batwing sleeves!  I was skeptical at first, but once I tried it on I can feel how comfy they make it.
Ottobre 1/2015

Ottobre – 1-2015 #9 Crocodile Hoodie

Things I Learned

  • There are different ways to do binding.  I had to try out a new way this time so raw edges wouldn’t be shown inside the hood.
  • If a stretchy knit isn’t cut carefully, it could end up misshapen.  One piece of the hood lining was too large and I had to cut it to match after I had sewn one of the seams.  Next time for the hood I will cut one piece at a time instead of doubling up and I will make sure all pieces are the same size before sewing!
Ottobre 4/2014

Ottobre – 4-2014 #16 Mushroom Jersey Top – Version 2


Things I Learned

  • Pockets – I tried to improve upon my pocket construction this time around. I was hoping to get the ribbing to be a little neater and flatter. It did turn out better… at first. Then after washing the ribbing was all wavy again. Maybe I need thicker ribbing? The stuff I used was pretty thin and stretchy.
Ottobre 4/2014

Ottobre – 4-2014 #16 Mushroom Jersey Top


Things I Learned

  • Pockets – I had never done welt pockets before and struggled so much trying to understand the Ottobre instructions.  I finally decided to take some scrap fabric and do a test.  It really helped me and made a couple mistakes on it that I was able to do correctly for the real shirt.
  • Flatlock stitching – I also hadn’t done flatlock stitching before. I had to practice a bit on before attempting it on this shirt. I’m happy with the results! Kind of a neat effect. I was worried about the stitches being too loose and coming undone over time, but it has survived a lot of washes.

This shirt was pictured on a boy in the magazine, but I think it looks great as a girl’s shirt as well.