How cute is Mr. Frosty! This pattern and fabric are designed by Heather Peterson of Anka’s Treasures whom I had the pleasure to meet in August 2021 at her presentation for my quilt guild. After seeing her trunk show of quilts, I purchased this kit (and some other patterns) at the meeting.
I love this classic snowman with some quilt blocks thrown in to look like snowflakes.
The original pattern was designed as a table runner, with the two snowmen placed opposite each other, head to head. As I pieced them together I decided they really need to be featured on a wall where I can easily see them, so I modified them and added a top border to each so they could be separate wall hangings.
Finished Size: 20.5" x 29"
Pattern: Mr. Frosty from Trendy Tables 3 book by Anka's Treasures
Fabric: Snowed In by Heather Peterson of Anka's Treasures for Riley Blake
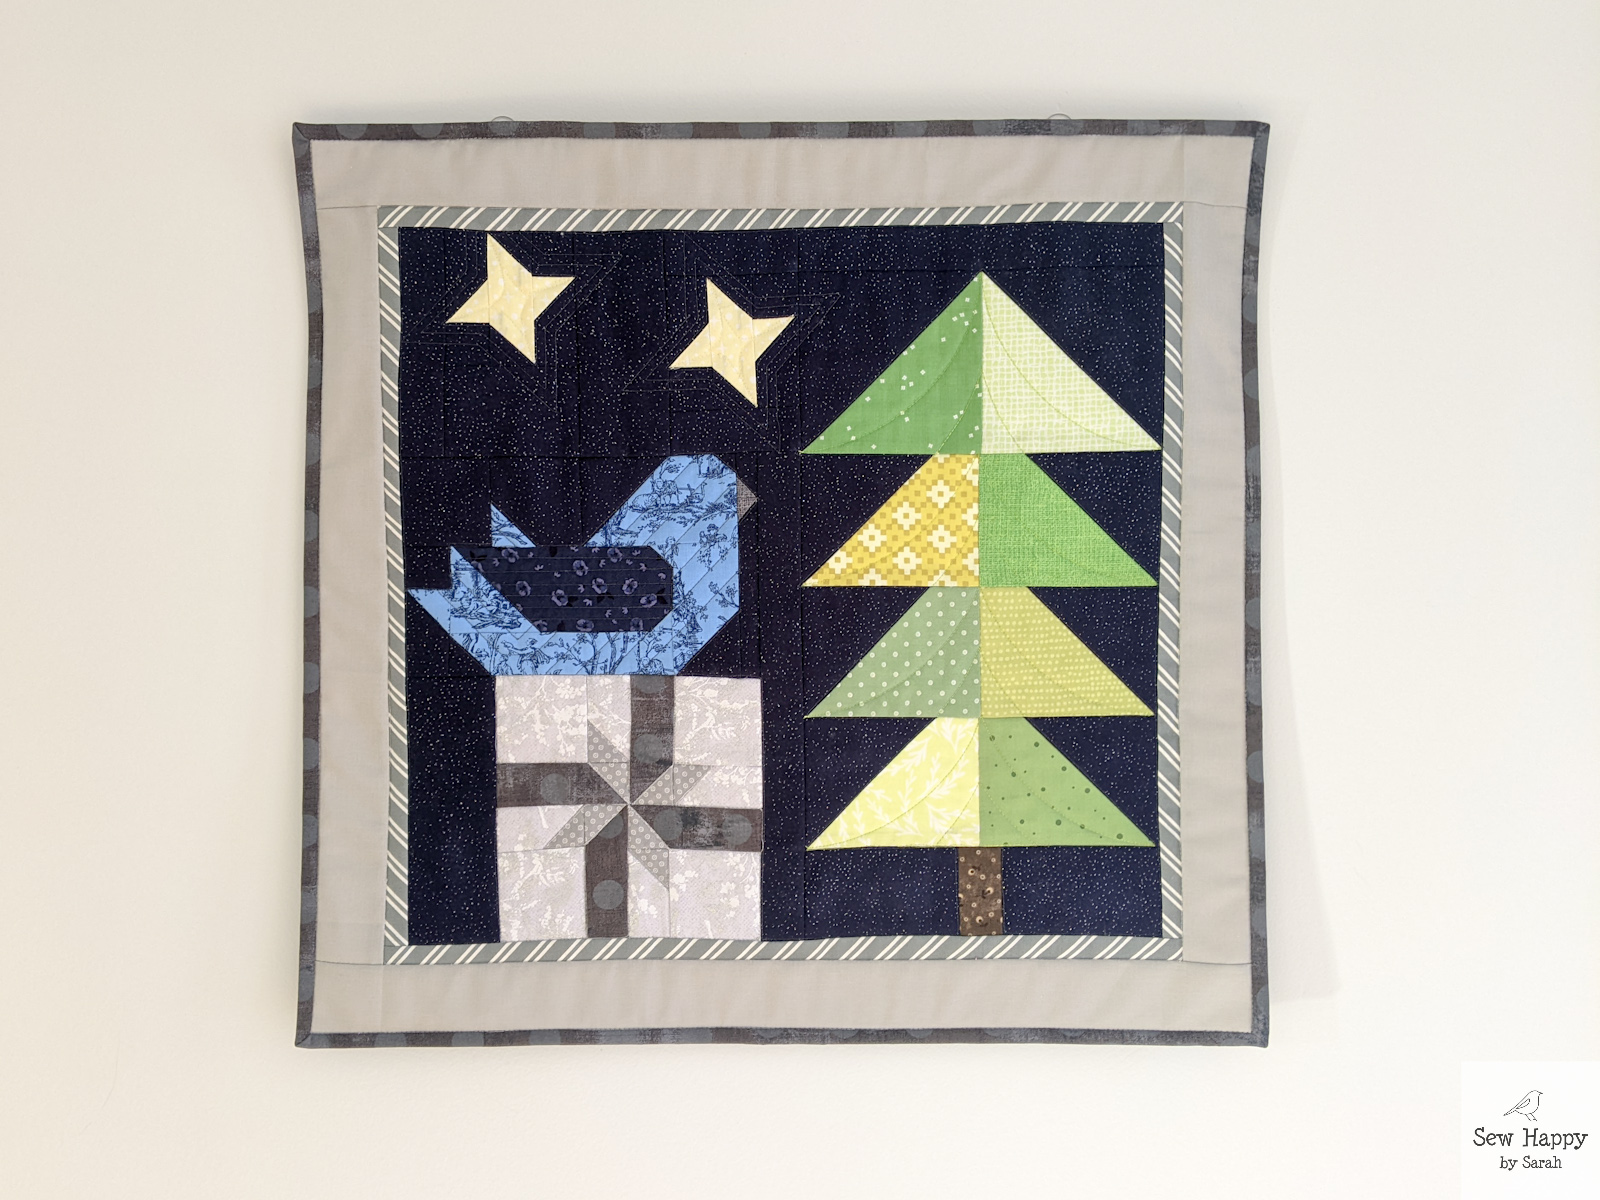
I’m always up for a sewing challenge, so when I heard about a “Stash Buster” monthly challenge at a quilt shop and saw January’s pattern featured a bird I bought it and got to work! The idea is you make the pattern for the month using fabrics from your stash and you have creative free rein to make whatever modifications to the design you’d like. Then, during the following month, you post your picture on the shop’s Facebook page and whoever’s picture gets the most “likes” wins $20 to spend at the shop. I noticed only a few people submitted entries for the previous month, so I had a good chance to win something!
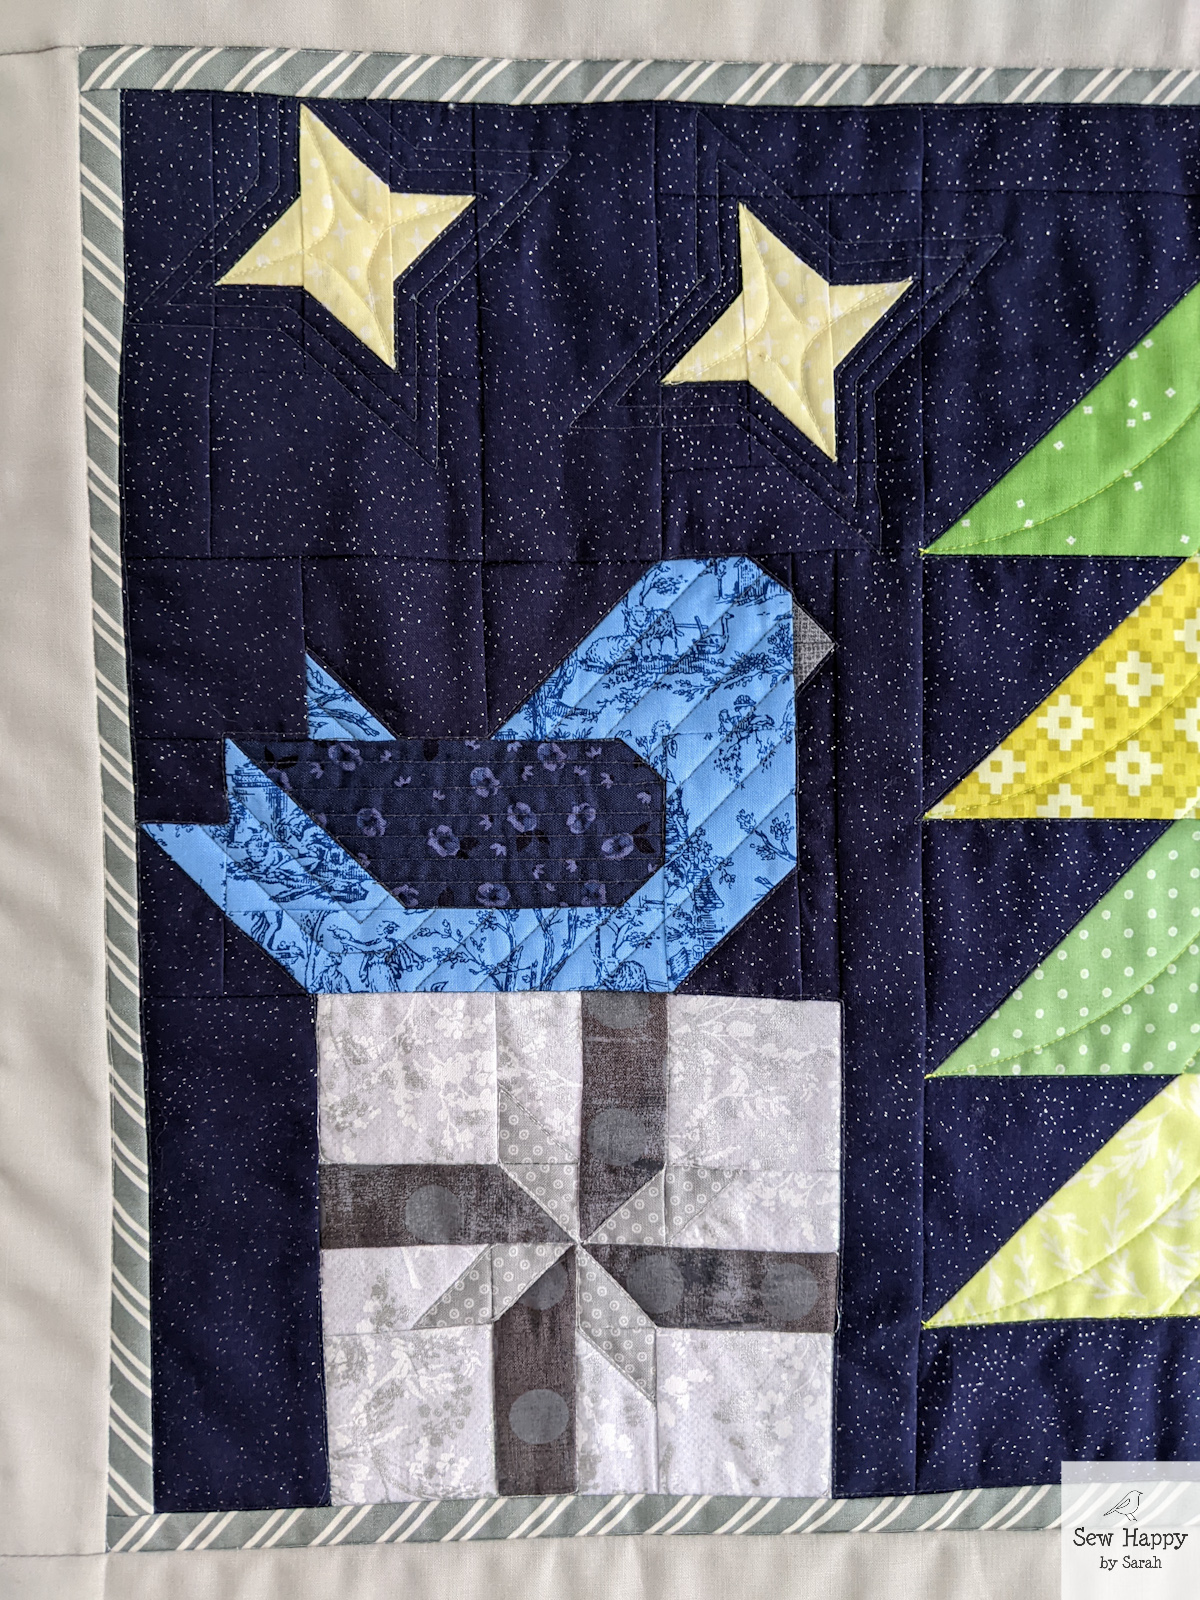
Choosing fabrics for this was quite different for me, as I usually make quilts from kits where the fabric is already chosen. I stretched myself on this and got to use some of my scraps. The mix of greens for the tree was fun to pick out. I decided I wanted a dark background so it would look like a midnight scene out in the stars. Well, I found some midnight blue glittery fabric scraps leftover from a dress I made my daughter and knew it was the one! I chose the blues for the birds in hues similar to the sky. I used neutral grays for the gift and borders because I wanted the focus to really be the bird and the tree.
I quilted subtle echos around the stars to try to bring them out and for the bird I did some angled lines. The quilting for the tree was my favorite part. I knew I wanted to represent the layers of branches somehow and when I came up with these curves I was so pleased! They add a bit of whimsy and make the tree more interesting.
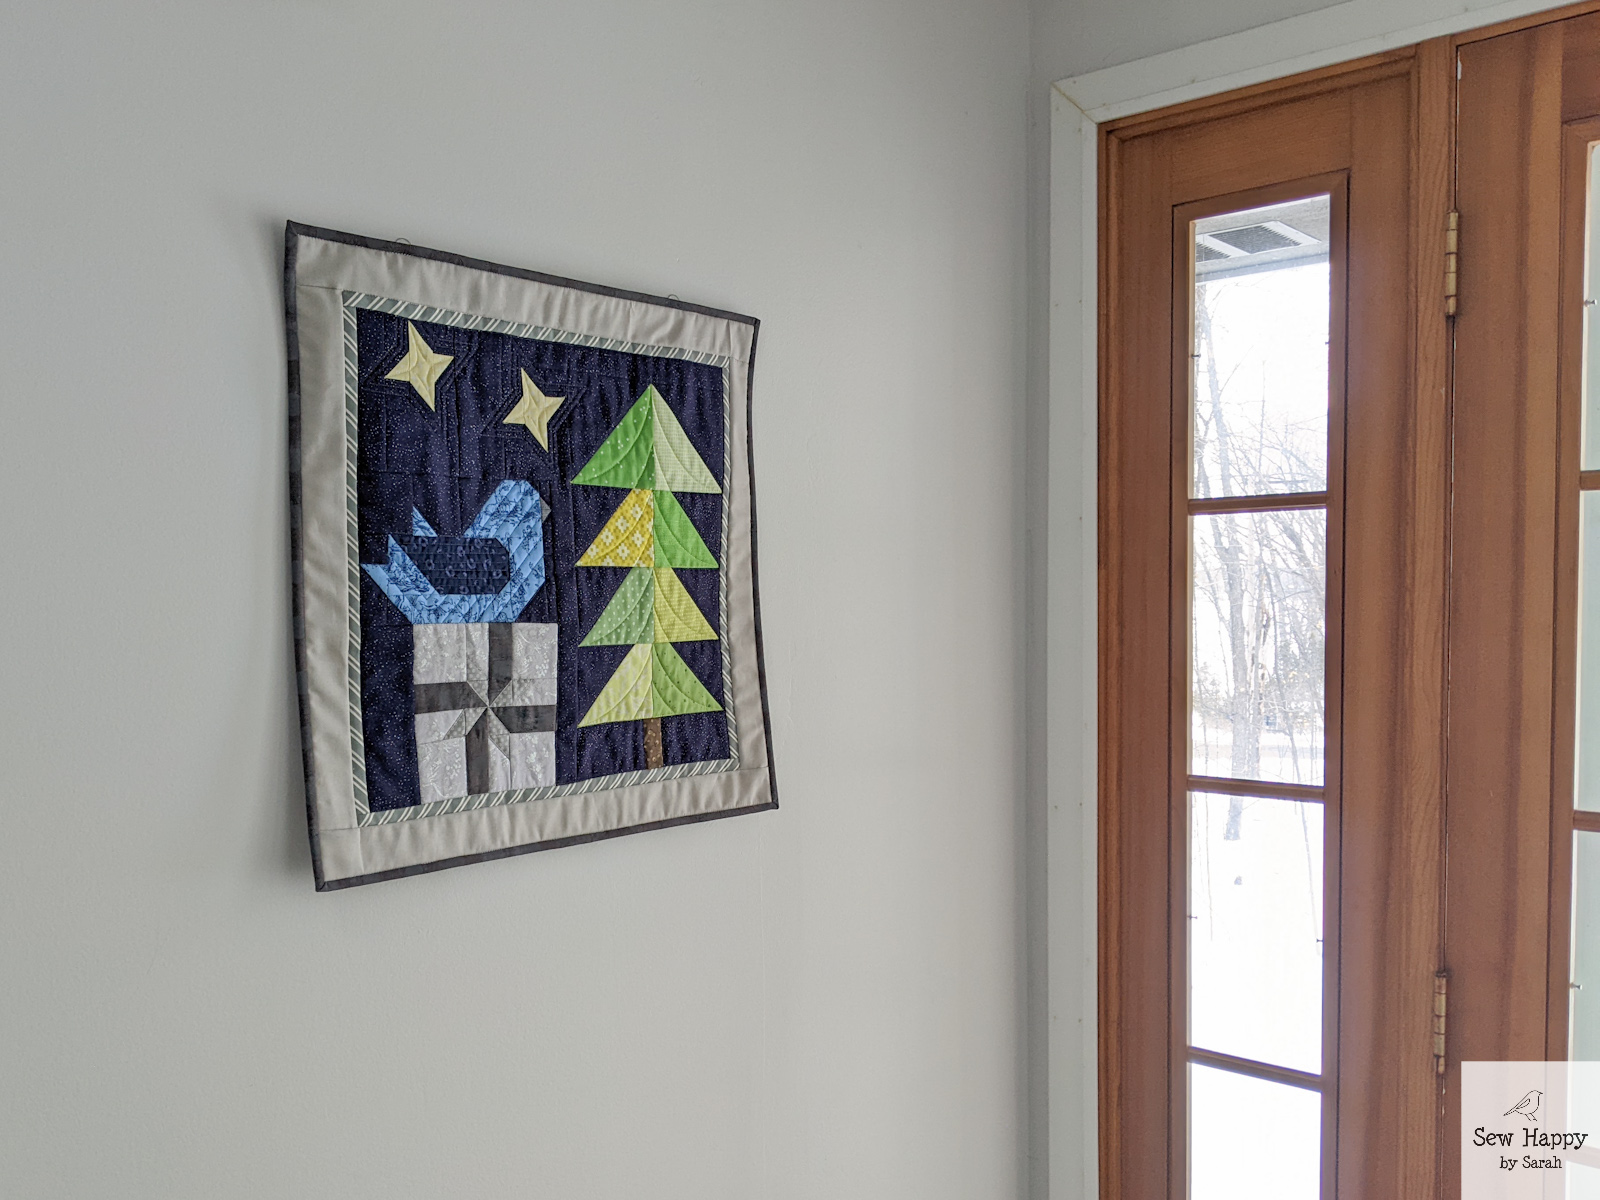
In the end, I got second place (out of two total entries). No big prize money for me, but I did win next month’s challenge pattern for free. Coincidentally I also won $10 from the shop in a random drawing the evening of the contest results, so I came out good on this! The next pattern is “Feathered Friends – Spring” featuring this bird in a flowery Spring scene. Looks like I better get working on my next entry!
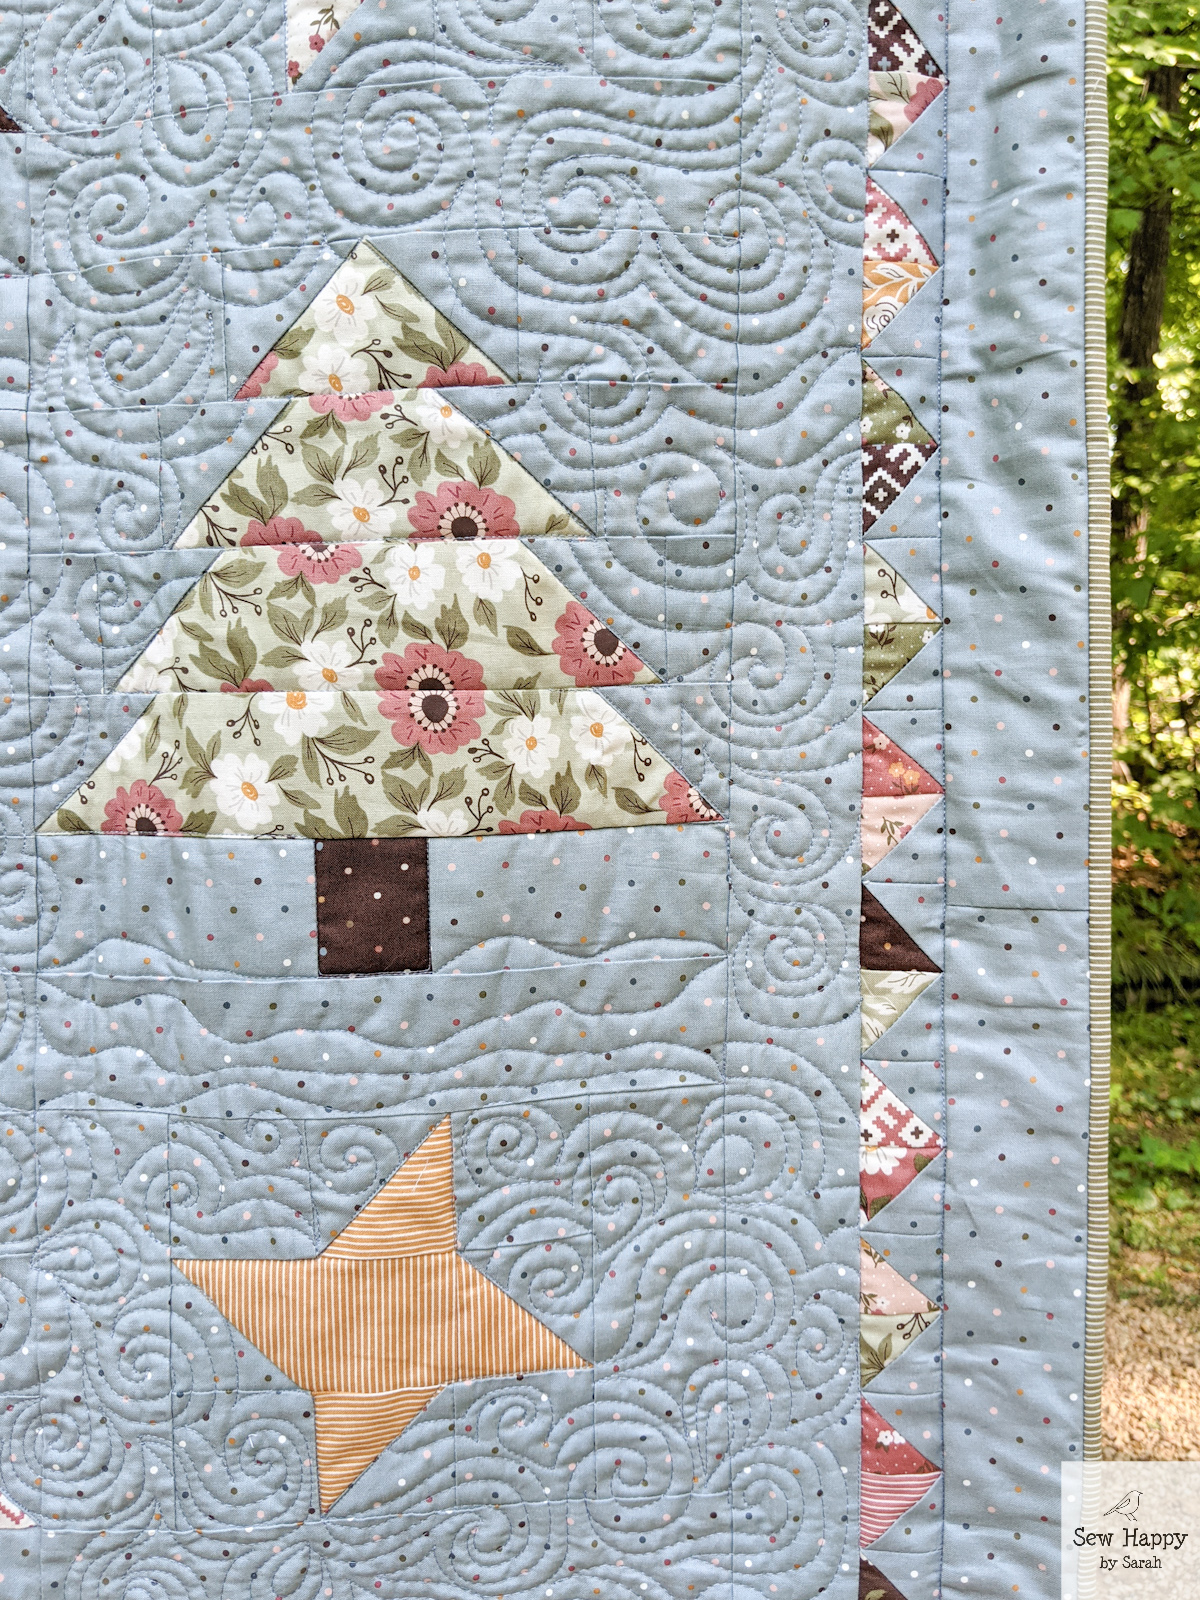
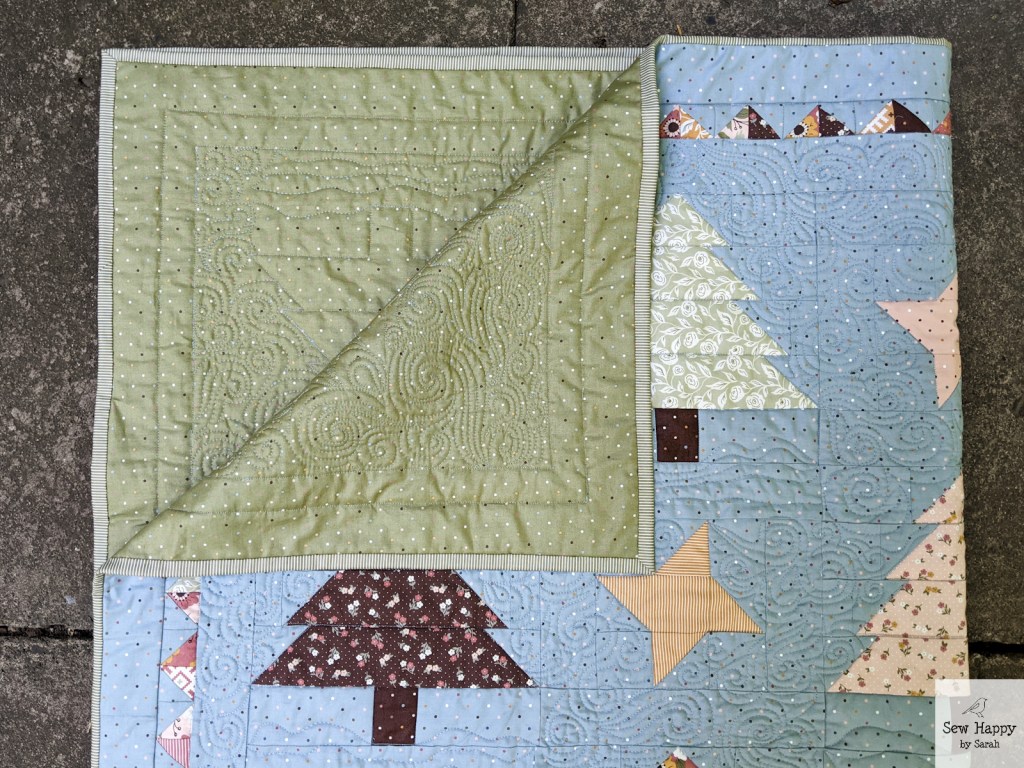
After working on a string of table runners, it feels good to complete a quilt! The Feelin’ Pine quilt pattern I used came from the November 2020 Sew Sampler Box from Fat Quarter Shop. Besides the pattern, the box included the fabric, which really gives a woodsy vibe if you ask me!
The original pattern was actually designed to be pine cones and stars, but I switched the pine cone layers up a bit, added a stump and they became trees!
Original pattern design
After I had assembled the quilt I decided it needed something more. I came up with the triangle border using scraps from all of the trees and stars. It really completes the quilt!
The cool icy blue fabric with dots that seem like snow creates a wintry woods scene to me. For the quilting design my first thought was to add a swirling wind throughout the sky. Once I started I was committed — even when I realized it was going to take a long time to quilt all of those swirls! I wanted to set the trees apart a bit so I gave them some layers of snow to stand on.
The backing fabric is green with dots similar to the blue fabric on the front. It coordinates well with the elegant striped binding. I can’t wait to pull this quilt out this winter to enjoy!
Finished Size: 59" x 67"
Pattern: Feelin' Pine Pattern exclusive to the Fat Quarter Shop Sew Sampler Box for November 2020
Fabric: Folktale by Lella Boutique for Moda
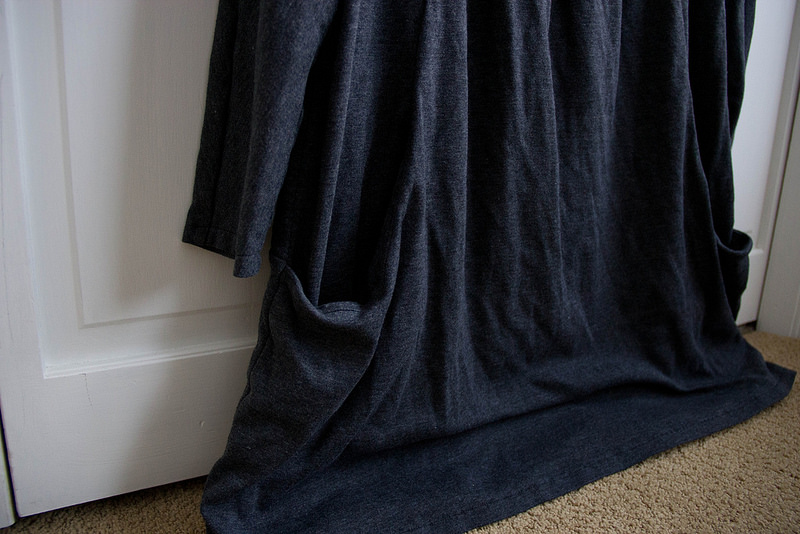
This is technically version 2 of this shirt, but I’m only documenting this one. 🙂 I messed up on the neckline of the first shirt so this is my remake.
Things I Learned
Pockets – I needed extra help understanding the understitching of the pockets and thankfully found a tutorial for the kids’ Flycatcher tunic that describes the same process: How to sew understitching for pockets.
Neckline – I didn’t fully understand the instructions for the neckline facing. I believe that I was supposed to turn the entire facing piece to the inside of the shirt, but I was worried it was going to make the neckline too wide for my tastes. I’m so used to doing binding that I just stuck with that. Unfortunately, either because of my fabric type or user error, the front of the neckline is a couple of small waves. 😦 This won’t prevent me from wearing it at home, but may prevent me wearing it out and about. We’ll see.
Sleeves – I really like the batwing sleeves! I was skeptical at first, but once I tried it on I can feel how comfy they make it.
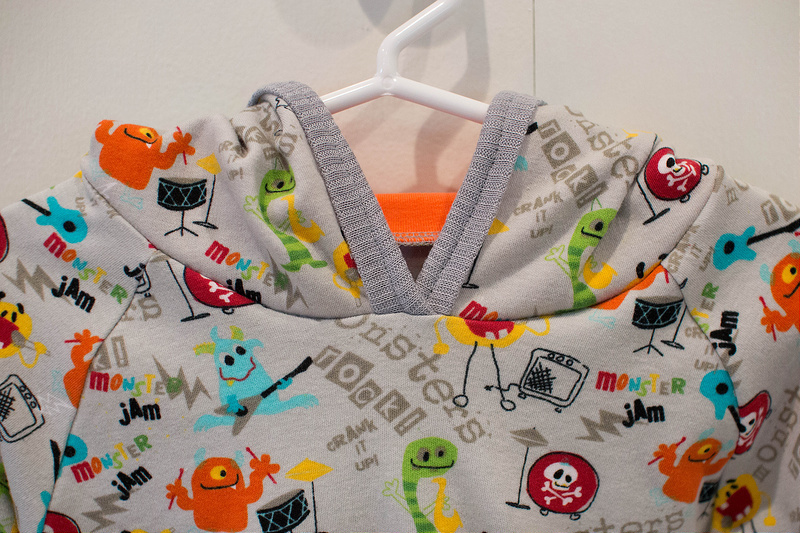
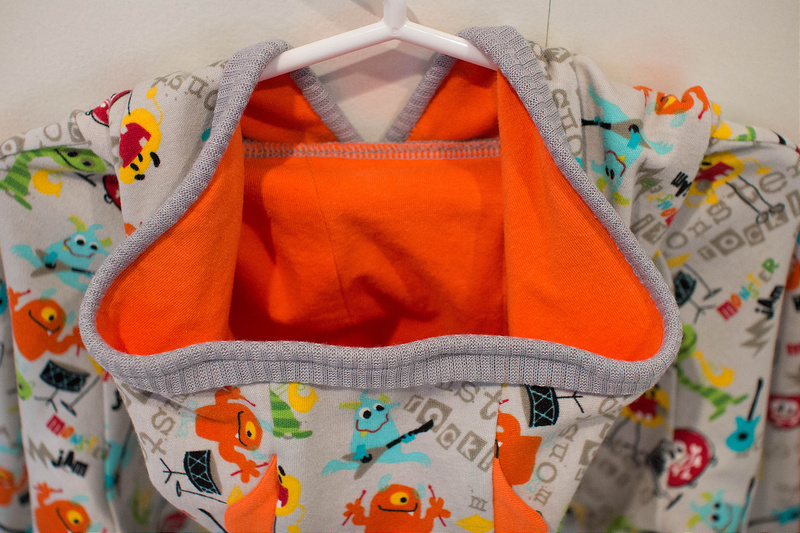
There are different ways to do binding. I had to try out a new way this time so raw edges wouldn’t be shown inside the hood.
If a stretchy knit isn’t cut carefully, it could end up misshapen. One piece of the hood lining was too large and I had to cut it to match after I had sewn one of the seams. Next time for the hood I will cut one piece at a time instead of doubling up and I will make sure all pieces are the same size before sewing!
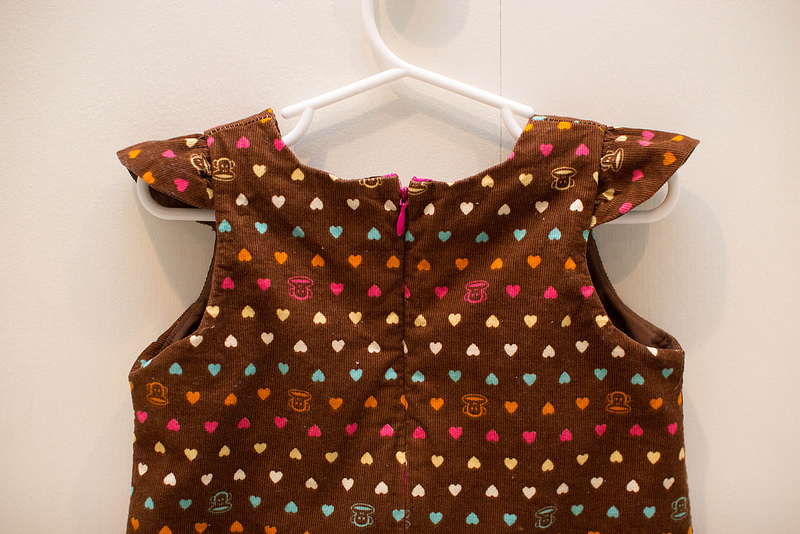
Cutting out fabric – I was just so excited to be starting this project that I didn’t realize how the pieces were going to need to be lined up until I had already cut some of them out. Surprisingly I was able to line up the rows of hearts & monkeys pretty well, however, looking at it now I see how the rows look skewed. It’s possible that this type of fabric design wasn’t made for this type of dress. The front and back of the dress are made out of 4 different panels. Next time I might use some solid colors to play up the different panels.
Lining – This was my first time lining a dress so I came across a couple terms I didn’t know of. Had to search for some online tutorials. I remember thinking “how in the world is this going to work out?”, but it did!
Zipper – Oh, the invisible zipper… My first time doing this as well. I had to install it and take it out again a few times… It turned out ok, just a little wonky at the top. It was functional, though!
Pockets – The faux pockets turned out cute! (Also easier than real pockets!)
I really think this is a sweet, classic design. I will definitely make this for my daughter again.